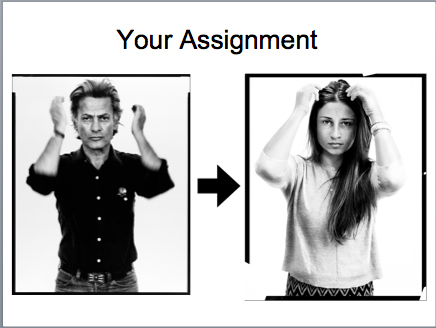
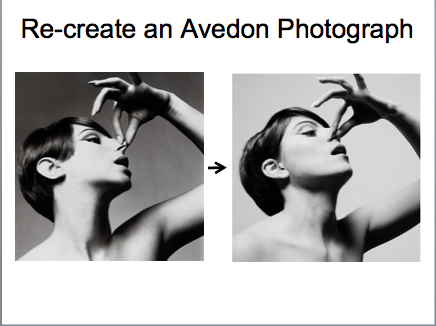
objectives: students will re-create a photograph by richard avedon, focusing on the style, composition, pose and lighting of the photograph.
Your assignment:
|
|
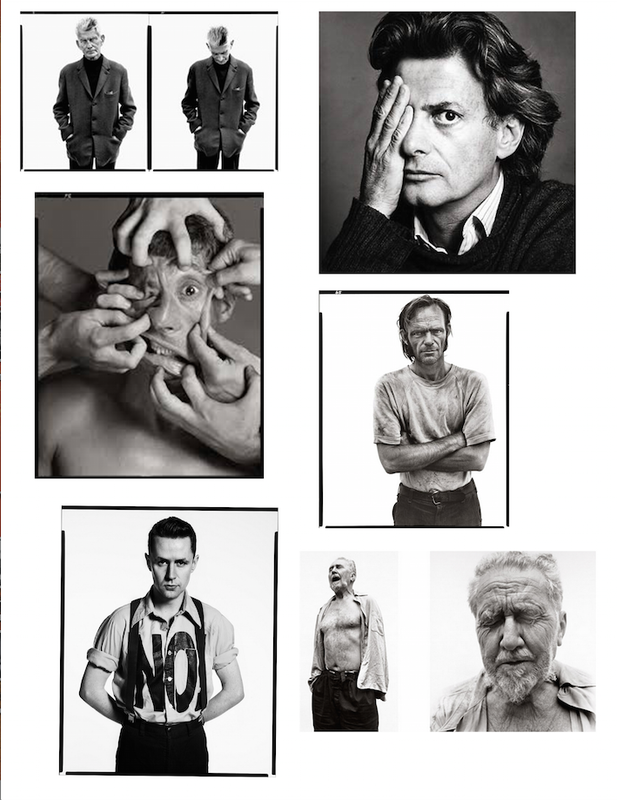
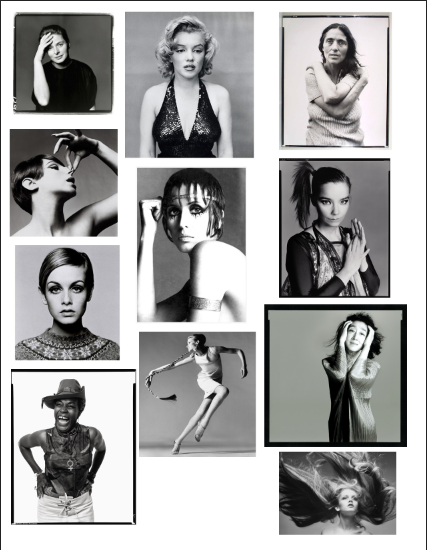
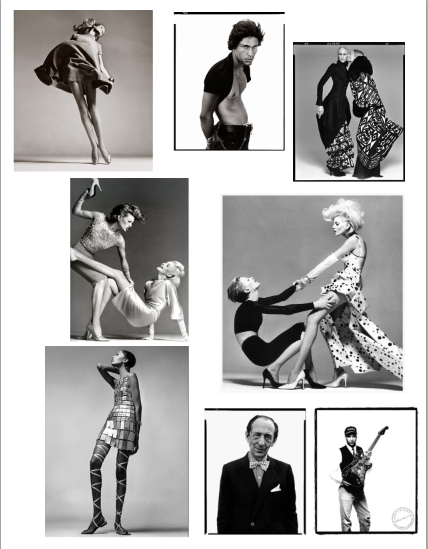
Step 1: Choose a photograph to re-create
Choose a photo below, or research for a different Avedon photograph online and have it approved by me.
|
|
|
step 2: recreate the composition
Consider these 3 things in particular...
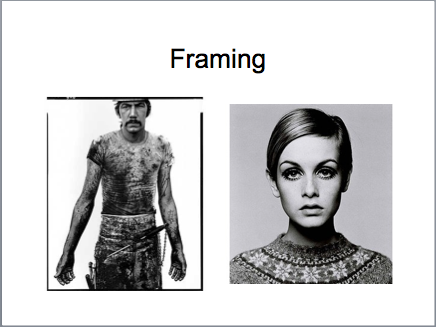
Is it cropped in close just around the face? Is it a wider frame that includes the whole body? Where is the body being "cut off?"
|
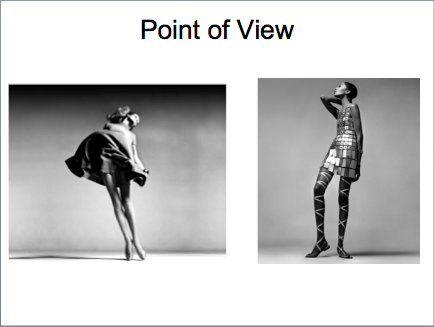
Where do you think Avedon was when he took the photograph? Low to the ground? Standing on a ladder from above?
|
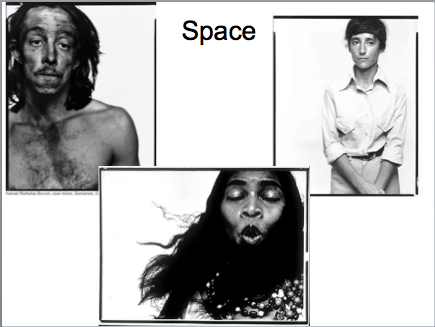
Notice the negative space. How much is there? How is space used? Does the photograph follow the rule of thirds?
|
Step 3: recreate the pose
Consider these 3 things in particular...
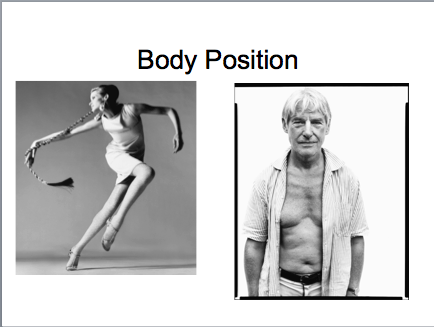
How is the body positioned? Is the model in motion? Are they standing still? What is their posture like? Where are the model's hands?
|
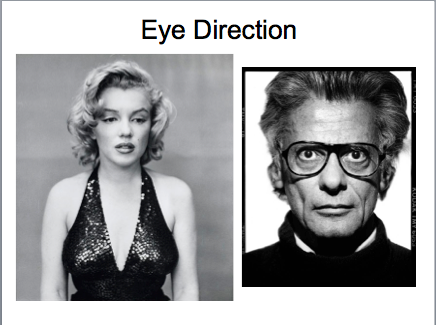
Where is the model looking? At the camera? Off to the side? Are eyes wide open and alert? Are they partially closed? Squinting?
|
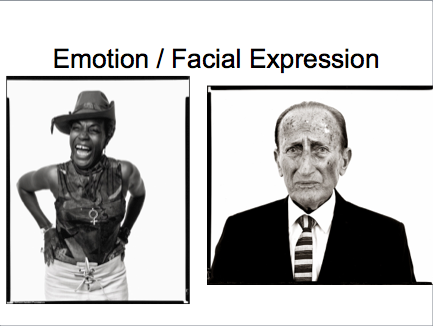
What type of facial expression does the model have? Serious? Worried? Happy? Emotionless?
|
step 4: Recreate the lighting
Consider these 3 things in particular...
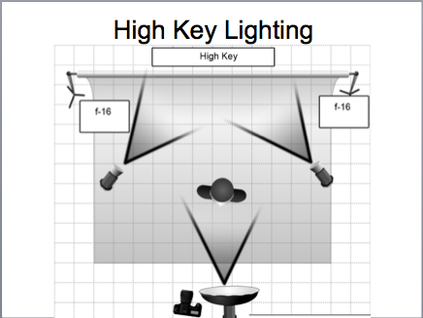
Is your subject more evenly lit? Without very strong shadows? If so, this may suggest your subject is lit from both sides, or using 3 point lighting (See below)
|
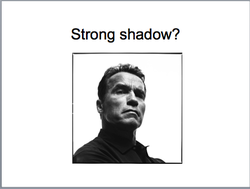
Does your subject have a strong dark shadow on one side of their face and body? If so, this may suggest your subject has a strong light source on one side of their face.
|
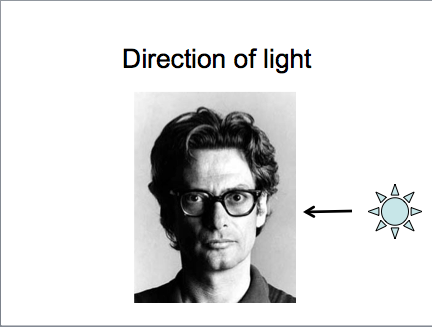
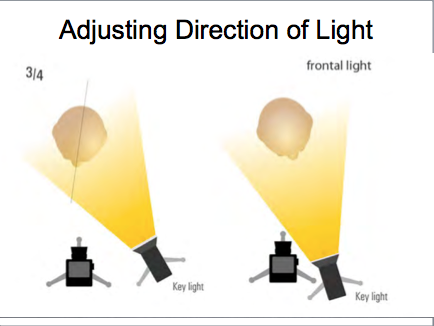
What direction is the light coming from? The light will be coming from the side of the face that is brighter, or opposite of the side with the shadow. You will have to place your lights in the same location.
|
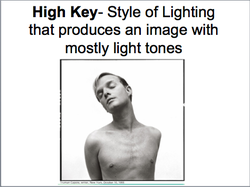
High Key Lighting
|
|
CAMERA SETTINGS
To create a HIGH KEY portrait, with a pure white background, you will need to OVEREXPOSE the background (but not your model!).
Try the following settings (you may need to adjust):
MANUAL MODE
F 4.0
1/60 SEC
ISO 800
FLASH OFF
AWB
Try the following settings (you may need to adjust):
MANUAL MODE
F 4.0
1/60 SEC
ISO 800
FLASH OFF
AWB
step 5: recreate the style in photoshop
Follow the directions below:
crop to 8 x 10 inches, 300 resolution
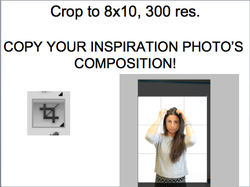
Crop your photo to 8x10 inches, 300 resolution.
Make sure your entire crop box stays within your photo as you drag it out and reposition it.
As you position your crop box, MAKE SURE YOU RE-CREATE YOUR INSPIRATION PHOTO'S COMPOSITION, FRAMING, USE OF SPACE, ETC.
Crop out anything in the background other than the white sheet!
Make sure your entire crop box stays within your photo as you drag it out and reposition it.
As you position your crop box, MAKE SURE YOU RE-CREATE YOUR INSPIRATION PHOTO'S COMPOSITION, FRAMING, USE OF SPACE, ETC.
Crop out anything in the background other than the white sheet!
convert to black and white
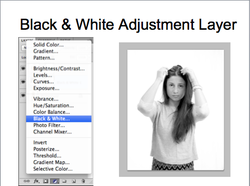
Click "new adjustment layer" button at bottom of layers panel, select "black and white"
adjust "levels"
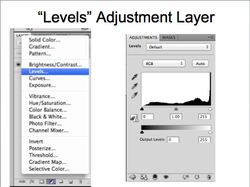
Click "new adjustment layer" button at bottom of layers panel, select "levels."
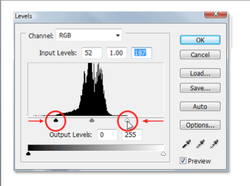
To adjust your levels-
1.) drag black slider to right until it lines up with where the "hill" starts to rise.
2.) drag white slider to left until it lines up with where the "hill" starts to rise.
3.) drag gray middle slider to the right to lighten (or left to darken).
REMEMBER: THIS IS A HIGH KEY PORTRAIT, SO IT IS SUPPOSED TO BE LIGHT! DO NOT DARKEN TOO MUCH.
adjust "curves"
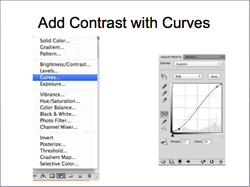
- Click "new adjustment layer" button at bottom of the layers panel. Select "curves"
- Click towards top of the diagonal line to add an anchor point, then drag upwards to lighten.
- Click towards bottom of diagonal line to add another anchor point, then drag down to darken.
REMEMBER: THIS IS A HIGH KEY PORTRAIT, SO IT IS SUPPOSED TO BE LIGHT! DO NOT DARKEN TOO MUCH.
- Click towards top of the diagonal line to add an anchor point, then drag upwards to lighten.
- Click towards bottom of diagonal line to add another anchor point, then drag down to darken.
REMEMBER: THIS IS A HIGH KEY PORTRAIT, SO IT IS SUPPOSED TO BE LIGHT! DO NOT DARKEN TOO MUCH.
when adjusting levels and curves... use caution!
don't blow out highlights on your model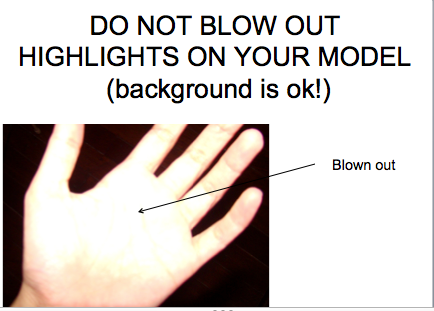
To be "blown out" means that an area has become so light that it is pure white. This is bad because it causes you to lose all details in that area. For example, in the photo above, we can no longer make out any details of the hand where it is blown out (no lines, shading, etc.). You want to AVOID THIS.
|
only blow out highlights in the background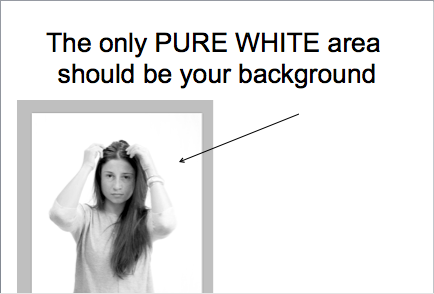
The only area that we actually WANT BLOWN OUT is our background. We want it blown out so that it is pure white. It shouldn't have any tone to it (ie: light gray) and it should have no details (ie: wrinkles or folds on the fabric)
|
don't clip shadows on your model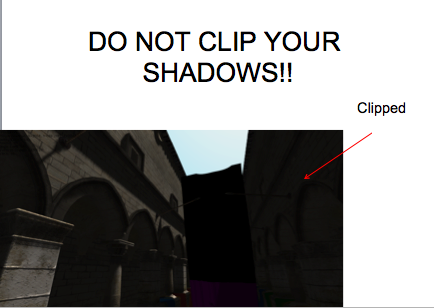
The opposite of a blown out highlight is a "clipped shadow." This too, is to be AVOIDED. If you darken your shadow areas too much, large areas may turn 100% black. This again is bad because all details in that area are lost. For example, in the photo above, you can not see what is going on on the building because the clipped shadows have erased all details.
|
make sure background is 100% white
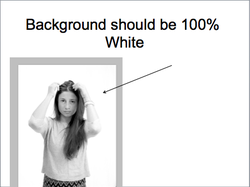
To make this a high key portrait, and to keep with Avedon's style, the background needs to be 100% white. If it is not, follow the directions below...
(If your background is already 100% white, then skip ahead to adding the border)
(If your background is already 100% white, then skip ahead to adding the border)
if its not....
OPTION #1: (IF YOU ONLY HAVE A FEW SMALL AREAS TO TOUCH UP)
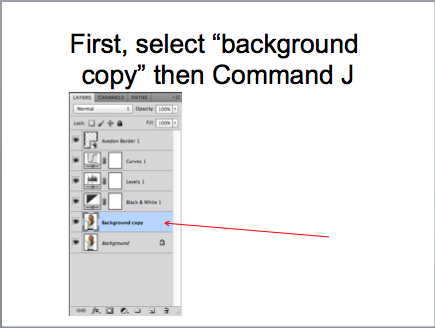
Click on your BACKGROUND LAYER.
Hit COMMAND J to duplicate it. |
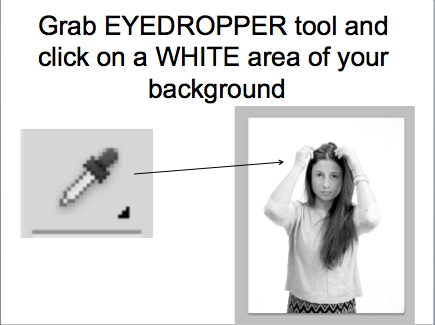
Grab your EYE DROPPER tool.
Click on a WHITE area of the background to select that exact shade of white. |
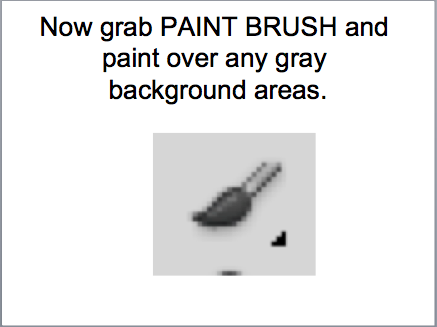
Now grab your PAINTBRUSH tool.
Paint over any background areas that are not white. |
OPTION #2: (IF YOU HAVE A LOT YOU NEED TO GET RID OF IN YOUR BACKGROUND)
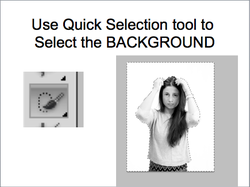
Use quick selection tool to select the BACKGROUND.
Do this carefully and take your time! |
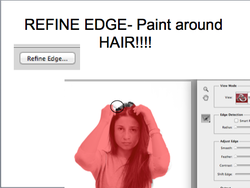
When finished, click "refine edge" (in options bar).
"Paint" around edges of hair to select them. |
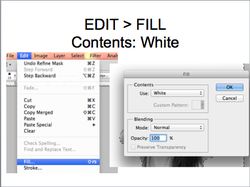
Go to Edit, the "Fill."
Under "Contents" select "White." Click OK. |
add border!
|
Download the file to the right. It will open up in a new browser window. When it does, click the image, and then drag and drop it onto your desktop.
|

|

| ||
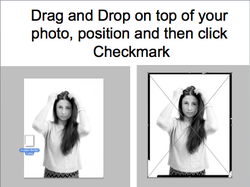
Once you have downloaded the file above, and dragged and dropped it onto your desktop, then drag and drop it onto your photo in photoshop. Or you could go to "File > Place" and then find the file under "desktop"
Once you have placed the file, position it so it fits perfectly inside the edges of your image.
Click the checkmark in your options tool bar to confirm.
Once you have placed the file, position it so it fits perfectly inside the edges of your image.
Click the checkmark in your options tool bar to confirm.

|
Once you add your border, check out your INSPIRATION IMAGE and resize the border so that it cuts off your subject at the right areas.
Do COMMAND T to "transform" your image and resize. Hit CHECKMARK when done. If your frame is smaller than your background, CROP off any excess. (HINT: it may NOT be 8x10 and that is ok. Just leave the HEIGHT and WIDTH boxes BLANK in your options bar and crop to whatever size it needs to be. |
Next: Dodging and burning...
Dodging allows you to lighten specific areas of your photo.
Burning allows you to darken specific areas of your photo.
Dodging and burning will give your photos a professional quality to them.
Burning allows you to darken specific areas of your photo.
Dodging and burning will give your photos a professional quality to them.

before you begin dodging and burning...
Next we will dodge and burn, but first...
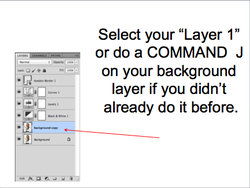
If you already did a "COMMAND J" on your background layer earlier on, select that duplicate layer (Usually named "Layer 1")
If not, make one now by following the steps below.
Click on your Background layer.
Command J
You will "dodge and burn" on your "background copy" or "layer 1" layer.
If you already did a "COMMAND J" on your background layer earlier on, select that duplicate layer (Usually named "Layer 1")
If not, make one now by following the steps below.
Click on your Background layer.
Command J
You will "dodge and burn" on your "background copy" or "layer 1" layer.
dodge highlights (lighten)
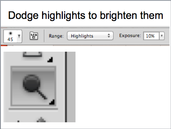
Select Dodge Tool
Set Range to "highlights" Exposure: 10% Soft edge brush Appropriate size brush for area |
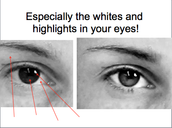
Dodge the whites of your eyes
Dodge the highlights in your eyes. |
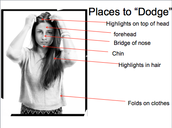
Other places you may want to dodge:
Highlights on face (raised areas) Highlights in hair Highlights on skin (neck, arms) Highlights on folds of clothing |
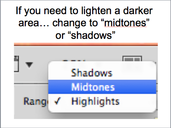
If you need to lighten a darker area, select mid tones or shadows for your range in your options bar.
|
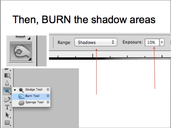
burn shadows (Darken shadows)
Select the Burn Tool by holding down the dodge tool in the tools bar.
Set range to "Shadows" Exposure 10% Soft edge brush Appropriate size brush for area |
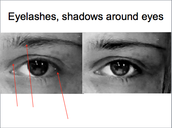
Dodge your pupils, eyelashes, corners of eyes, eyelid crease and eyebrows.
|
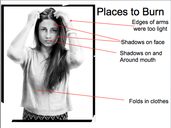
Other places you may want to burn:
Shadows on face (sides of face, recessed areas) Shadows in hair Shadows on skin (neck, arms) Shadows in folds of clothing. |
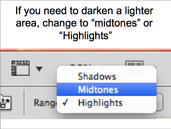
If you need to darken a lighter area, select mid tones or highlights for your range in your options bar.
|
dodging and burning tip:
|
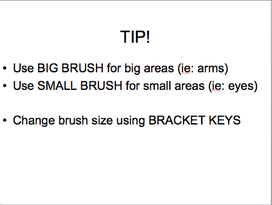
- Make sure you change your brush size based on the size of the area you are dodging or burning.
If you are working on a LARGE AREA (ie: your arm), use a LARGE BRUSH. If you are working on a SMALL AREA (ie: your eye), use a SMALL BRUSH. Use the BRACKET KEYS on your keyboard to increase or decrease brush size. Also... DON'T OVER-DO IT! It will look FAKE! |
optional: intensify contrast with "soft light"
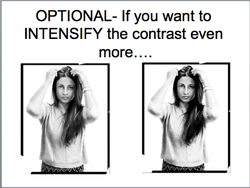
Finally, you may want to intensify your highlights and shadows to make your image more dramatic looking.
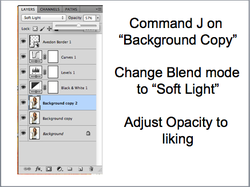
To do this, select your "background copy" or "layer 1" layer
Command J to duplicate it.
Change the blend mode of "background copy 2" to "soft light"
Adjust the layer opacity to your liking.
Command J to duplicate it.
Change the blend mode of "background copy 2" to "soft light"
Adjust the layer opacity to your liking.
save your work!
Save as "First Name Last Name AVEDON"
Save as a .JPG and Photoshop format.
Save to pictures folder.
Save as a .JPG and Photoshop format.
Save to pictures folder.
