Objective: Students will understand what bokeh is and how to create good bokeh in their photographs
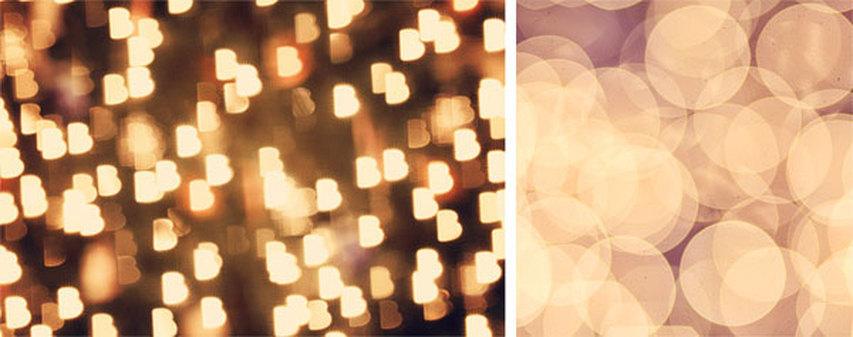
What is "Bokeh"?

The word "bokeh" comes from the Japanese word for "blur."
Bokeh is the quality of out-of-focus or “blurry” parts of the image rendered by a camera lens – it is NOT the blur itself or the amount of blur in the foreground or the background of a subject.
The blur that you are so used to seeing in photography that separates a subject from the background is the result of shallow “depth of field” and is generally simply called “background blur”.
The quality and feel of the background/foreground blur and reflected points of light, however, is what photographers call Bokeh.
Your assignment:
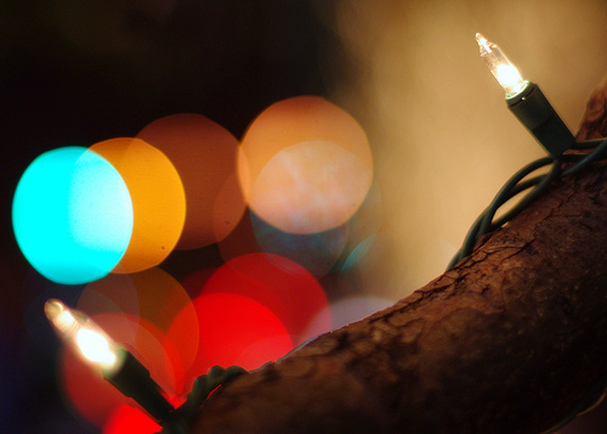
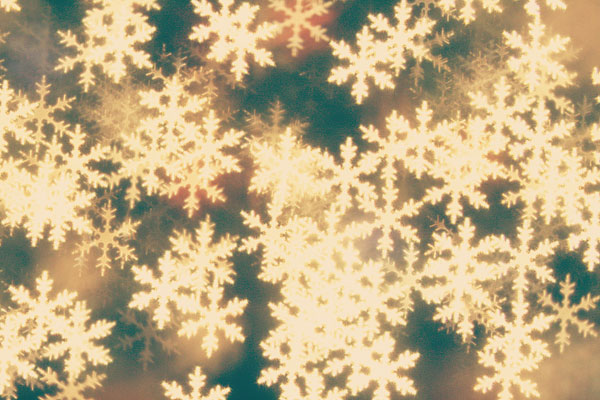
Shoot a series of photographs with good "bokeh" using Christmas lights. Try to create bokeh shapes using a special hood on your lens, or shoot without the hood to create circular bokeh lights. Try shooting just the lights, as well as incorporating a clear subject in the foreground.
Making the hood for bokeh shapes:

video instructions
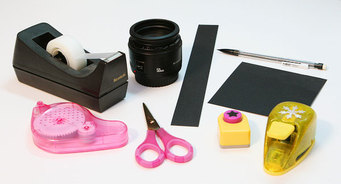
Here's what we'll need:
- Black card stock or heavy paper
- Scissors
- Exacto Knife or decorative hole-punch
- Tape
- Glue Stick / Adhesive
- Pencil
- Camera Lens (a "faster" lens with a nice wide aperture would work much better for this, but we will do the best we can with our "kit" lens)
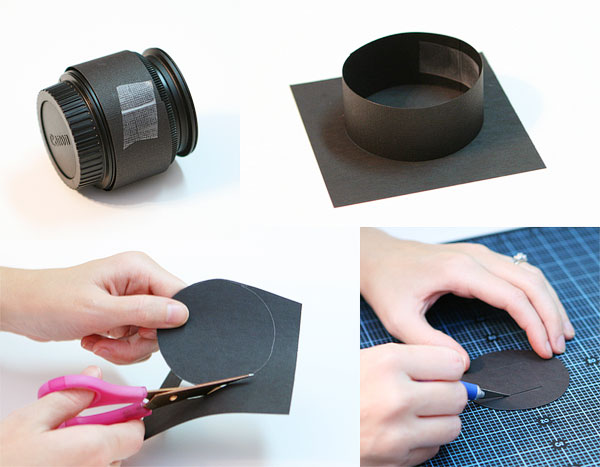
1. To begin, take a strip of paper and form a ring around your lens- tape the paper together so that it fits snugly around the lens. (Leave lens cap one while doing this to prevent scratching/touching the lens)
2. Take the ring off the lens, place it on a piece of black cardstock and trace a circle around the ring.
3. Cut out the circle.
4. Using an exacto knife, cut a square in the middle of the circle.
2. Take the ring off the lens, place it on a piece of black cardstock and trace a circle around the ring.
3. Cut out the circle.
4. Using an exacto knife, cut a square in the middle of the circle.
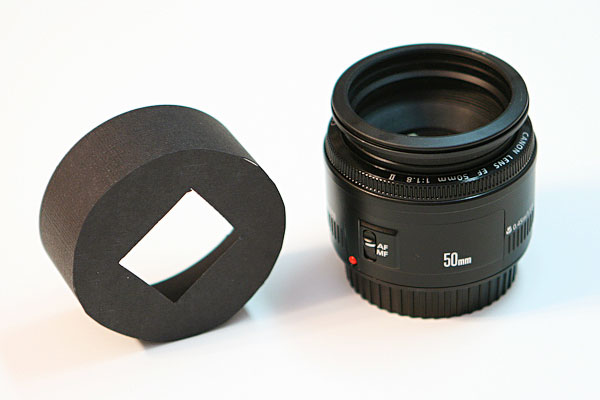
5. So, now you have a ring and a circle with a square cut out of the middle. Tape them together like pictured above to form a “hood”. For the benefit of the picture, I put the tape on the inside so you can’t see it, but you could tape it on the outside instead. It’s easier and it works just as well.
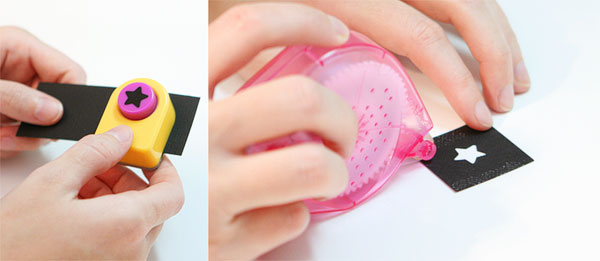
6. Now it’s time to cut out your shapes! You can use scissors or an Xacto knife to cut out any shape you can imagine. Decorative hole-punches (like the one pictured above) work great too. CAUTION: Make shape no wider than 1 centimeter!
7. Cut out your shape, being sure to leave enough room on the edges so you can attach it to the “hood”. I used removable adhesive so I could easily switch between shapes on the hood. A glue stick works great too.
7. Cut out your shape, being sure to leave enough room on the edges so you can attach it to the “hood”. I used removable adhesive so I could easily switch between shapes on the hood. A glue stick works great too.
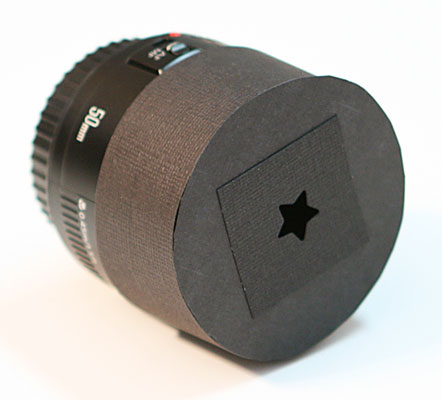
8. Attach the shape to the hood and put the hood on your lens- when you’re all done, it should look like this.
TIP: Using the hood lets in less light, so you have to set your shutter speed slower to compensate- use a tripod to keep your camera steady!
TIP: Using the hood lets in less light, so you have to set your shutter speed slower to compensate- use a tripod to keep your camera steady!
shooting
Using the hood lets in less light, so you have to set your shutter speed slower to compensate- use a tripod to keep your camera steady!
Take a photograph of Christmas lights. You want the lights to be blurred out to create nice, soft, bokeh shapes- so...
Experiment! Take photos of just the lights, or try to incorporate a subject in the foreground with the lights in the background.
Switch hoods with a classmate to try out other shapes and try it without the hood to get circular bokeh.
Take a photograph of Christmas lights. You want the lights to be blurred out to create nice, soft, bokeh shapes- so...
- Use the lowest f-stop possible (Use Av mode)
- Use a longer focal length (zoom-in)
- Place your camera far away from the Christmas lights
Experiment! Take photos of just the lights, or try to incorporate a subject in the foreground with the lights in the background.
Switch hoods with a classmate to try out other shapes and try it without the hood to get circular bokeh.