Students will understand how to use blur filters and layer masks to achieve a narrow depth of field in photoshop.
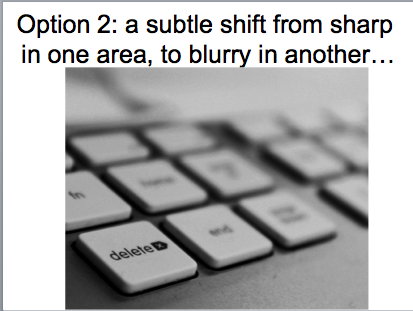
two methods.... for two different looks...
|
|
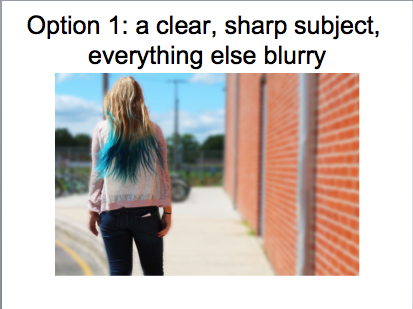
option 1: Instructions
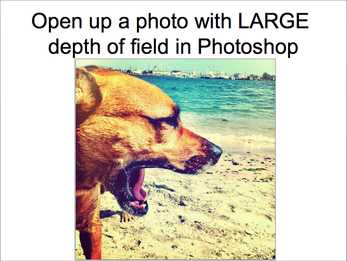
- File > Open
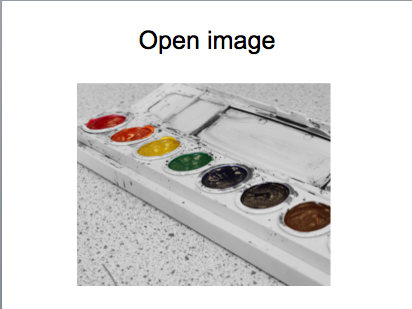
- Choose a photo with a clear subject as well as a sharp background.
- Choose a photo with a clear subject as well as a sharp background.
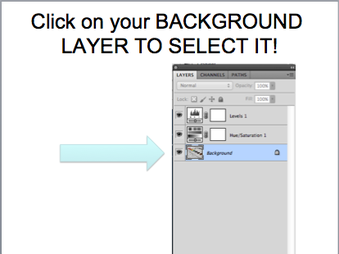
Select your BACKGROUND LAYER by clicking on it. It should be highlighted in blue.
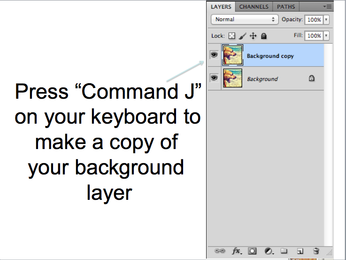
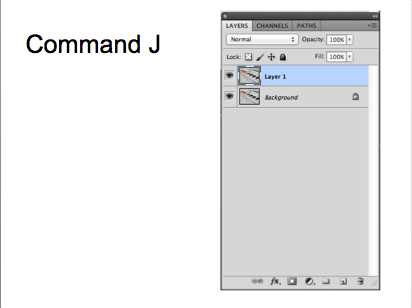
- Make a copy of your background layer by pressing Command and J on your keyboard.
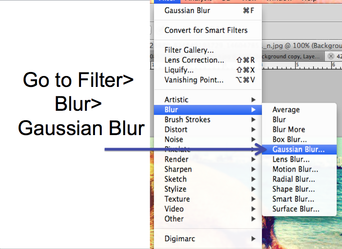
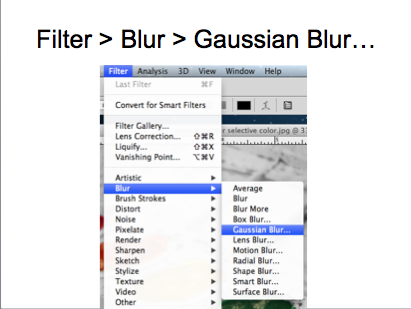
- With your top layer selected (background copy), go to Filter > Blur > Gaussian Blur

- Use the slider to adjust the blur amount.
- When deciding how blurry you want your image, just focus on the background, we will go back in a minute and make your subject clear again.
- When deciding how blurry you want your image, just focus on the background, we will go back in a minute and make your subject clear again.
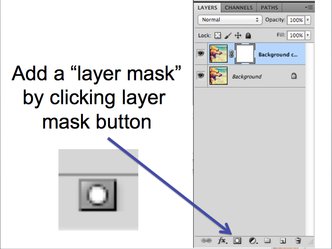
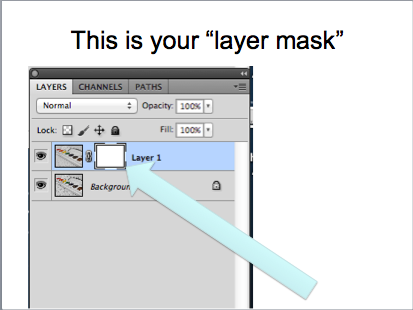
- Now we are going to add a "mask" to our blurry layer. The mask will allow us to hide certain parts of this blurry layer, letting the clearly focused layer beneath it show through.
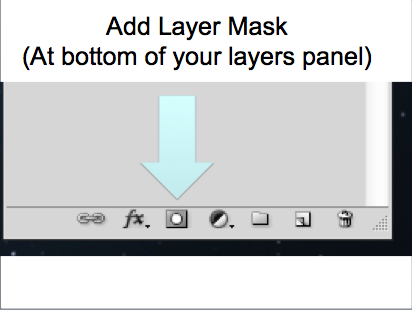
- To add a mask, click the "Add Layer Mask" button at the bottom of the layers panel.
-Your mask will appear next to the layer thumbnail as a white box.
- To add a mask, click the "Add Layer Mask" button at the bottom of the layers panel.
-Your mask will appear next to the layer thumbnail as a white box.

- Your mask currently is white. This means all parts of that layer are visible (white=visible)
- In order to hide certain sections of our blurry layer, we will need to paint on the mask with black to hide it (black=hidden)
-Choose your paintbrush tool.
- In order to hide certain sections of our blurry layer, we will need to paint on the mask with black to hide it (black=hidden)
-Choose your paintbrush tool.
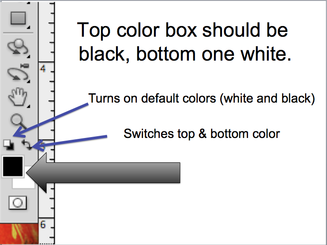
- Look to the color swatch boxes at the bottom of your tools panel.
- The top box represents your foreground color, the bottom box your background color.
- Right now, we want black as the foreground color.
-HINT: The small button directly above the color boxes and to the left will reset the colors to the default: white foreground and black background. If you have white as your foreground color and need to switch it with black, press the double-sided arrow button to the right to switch them.
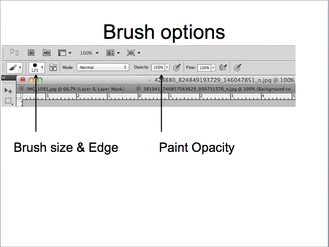
- You have several brush options above in the options bar.
- To the left is a drop-box for brush size and hardness.
- To the right is a drop-down box for paint opacity.
- To the left is a drop-box for brush size and hardness.
- To the right is a drop-down box for paint opacity.
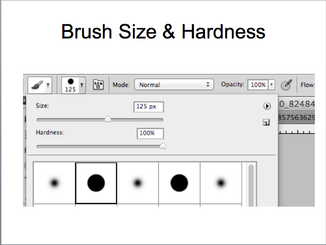
- When you click on the drop-down box for brush size, you will see the top slider will affect brush size and the bottom slider affects brush hardness.
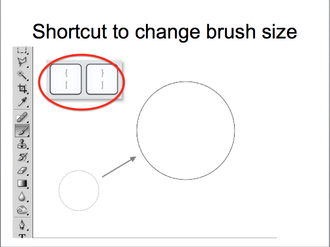
- A quick shortcut for changing brush size is to use your left and right bracket keys on your keyboard. The left bracket will decrease brush size, right bracket will increase it.
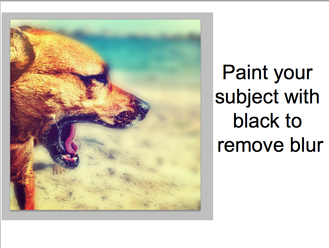
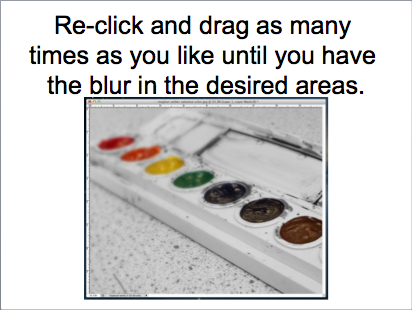
- Making sure that your layer mask is selected (click on the white box), start painting on your subject with a black paint brush.
- Where ever you paint should hide the blurry layer, and reveal the clear, sharp layer beneath it.
- Where ever you paint should hide the blurry layer, and reveal the clear, sharp layer beneath it.
- Be careful when painting around the edges of your subject. Go slow. You may also want to zoom in to make sure you are staying in the lines. (Command + will zoom in, Command - will zoom out)
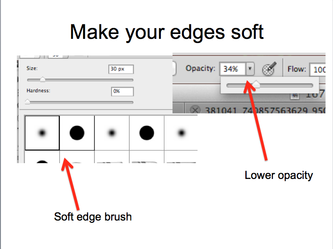
- Another trick is to make your eyes soft so that it subtly fades from clear to blurry.
- To do this, change your brush edge to the softest setting (0%) and turn your opacity down. Now paint along the edges of your subject for a subtle change from in focus to out of focus.
- Another trick is to make your eyes soft so that it subtly fades from clear to blurry.
- To do this, change your brush edge to the softest setting (0%) and turn your opacity down. Now paint along the edges of your subject for a subtle change from in focus to out of focus.
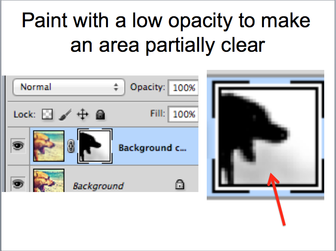
-Generally, the areas farthest away from your subject should be the blurriest, while areas closer to your subject may not be as blurry. To give this effect, you can paint some areas that are closer to your subject with a low opacity black paint brush. This will make the area look "Somewhat" blurry.
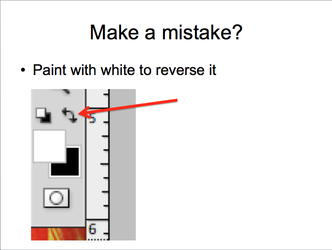
- If you make a mistake, you can automatically undo your last step by pressing Command Z on your keyboard.
- You can also reverse a step by switching your colors and painting with white. Painting with white will bring back the blurry layer.
- You can also reverse a step by switching your colors and painting with white. Painting with white will bring back the blurry layer.
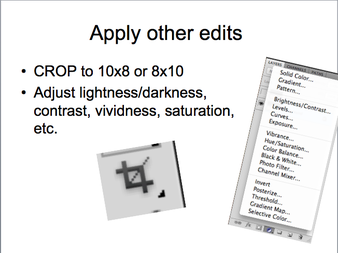
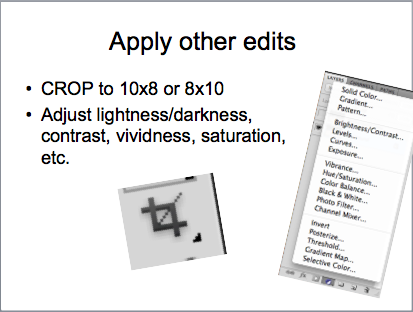
- Crop your image to 10x8 or 8x10, 300 res.
- Make other necessary adjustments to lightness/darkness, contrast, saturation, color balance, black&white, etc.
- Make other necessary adjustments to lightness/darkness, contrast, saturation, color balance, black&white, etc.
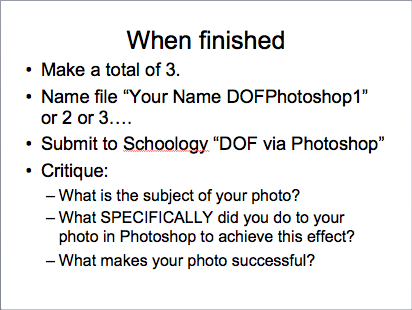
- When finished, save twice (as a .psd and .jpg) and upload finished image to Schoology (.jpg only!).
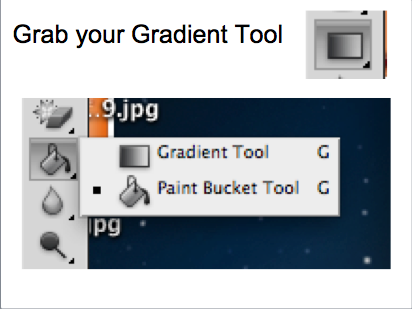
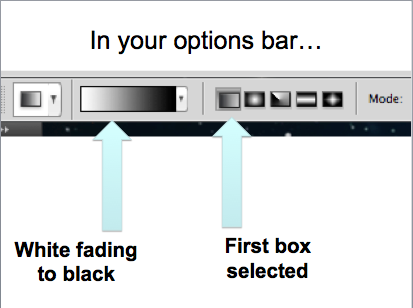
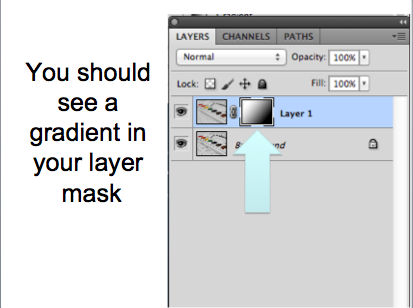
option 2: instructions