Objective: Students will understand how aperture affects depth of field and will use Av exposure mode to create different depths of field in a series of photographs.
Aperture review...
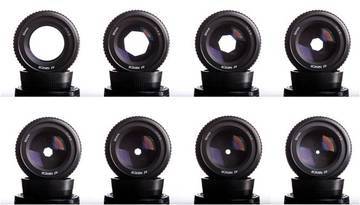
Aperture is the hole through which light enters the camera. The size of the hole can be changed to control how much light is let into the camera. Smaller aperture= less light, Larger aperture= more light!
Think of it like your pupil. When its dark out, your pupils open very wide to let more light in to help you see better. When you are outside in the bright sun, your pupils get smaller, to block some of that light out!
The size of the aperture is referred to as an "f-stop." Larger f-stop numbers (like f/22) designate a smaller aperture. Smaller f-stop numbers (like f/2.8) designate a wider aperture. (Confusing, I know!)
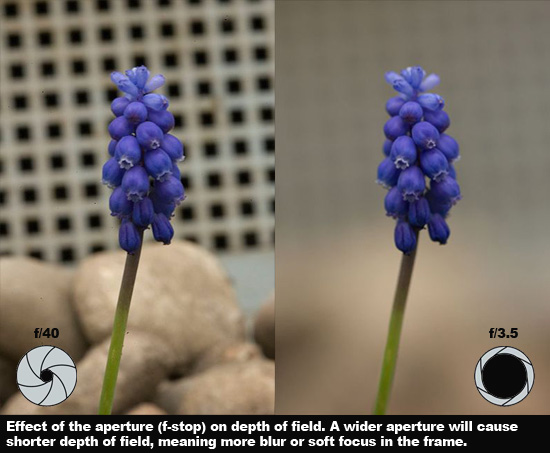
Shutter speed also controls your "depth of field" or the area of your photo that is in focus. A small aperture (larger f-stop number) will keep most if not all of your image in clear focus. A wide aperture (smaller f-stop number) will keep only a certain area of your photo in focus, leaving elements outside of that area blurry.
Your f-stop controls:
- Exposure (how much light is let in to your camera)
- Depth of Field (the area of your photo that is in focus)
Think of it like your pupil. When its dark out, your pupils open very wide to let more light in to help you see better. When you are outside in the bright sun, your pupils get smaller, to block some of that light out!
The size of the aperture is referred to as an "f-stop." Larger f-stop numbers (like f/22) designate a smaller aperture. Smaller f-stop numbers (like f/2.8) designate a wider aperture. (Confusing, I know!)
Shutter speed also controls your "depth of field" or the area of your photo that is in focus. A small aperture (larger f-stop number) will keep most if not all of your image in clear focus. A wide aperture (smaller f-stop number) will keep only a certain area of your photo in focus, leaving elements outside of that area blurry.
Your f-stop controls:
- Exposure (how much light is let in to your camera)
- Depth of Field (the area of your photo that is in focus)
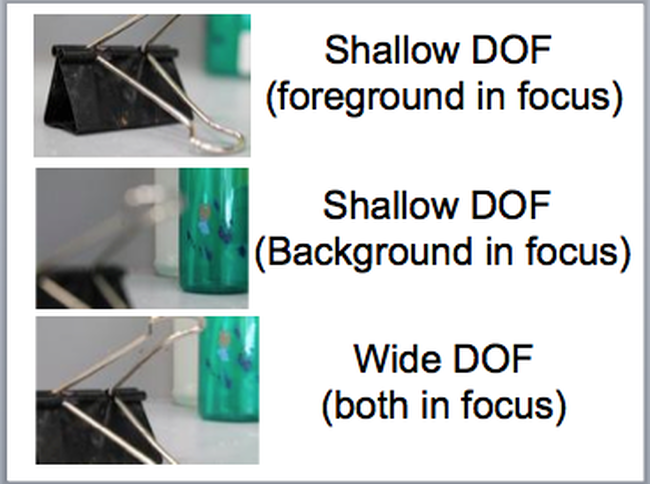
What is depth of field?
Depth of field refers to the range or distance in a photo that appears sharp and in focus.
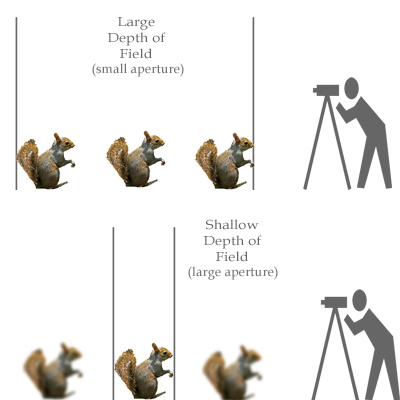
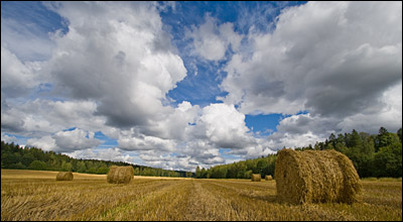
LARGE DEPTH OF FIELD
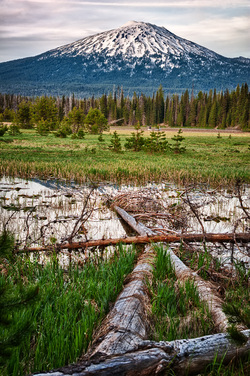
Useful when you want everything (near and far) to be in sharp focus, such as with a landscape. |
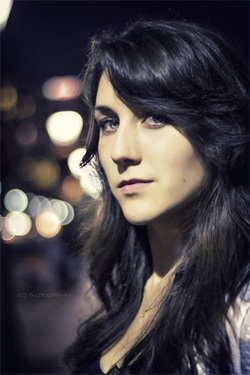
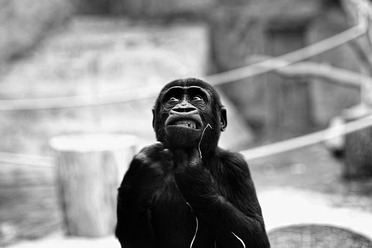
SHALLOW DEPTH OF FIELD
Useful when you only want a certain part of the image in focus, and the rest blurred out. This is useful in portraits. By blurring out the background, you simplify the image and keep the focus on your subject. |
3 ways to affect depth of field:
to create shallow depth of field:
- LARGE APERTURE (small f-stop number
- LONGER FOCAL LENGTH (zoom-in)
- CAMERA CLOSER TO SUBJECT, SUBJECT FARTHER FROM BACKGROUND
TO CREATE LARGE DEPTH OF FIELD:
- SMALL APERTURE (large f-stop number)
- SHORTER FOCAL LENGTH (zoom-out)
- CAMERA FARTHER AWAY FROM SUBJECT, SUBJECT CLOSER TO BACKGROUND
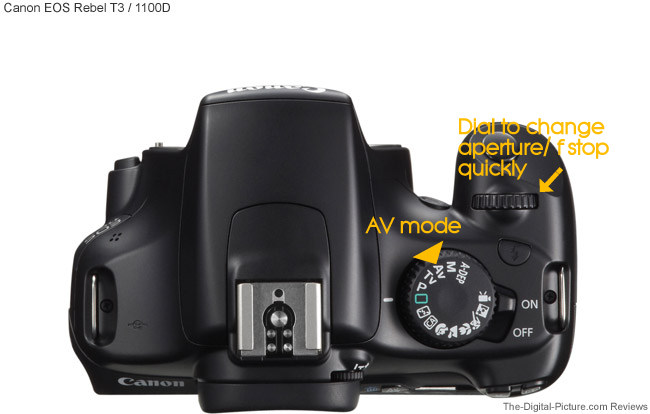
what exposure mode should i use?
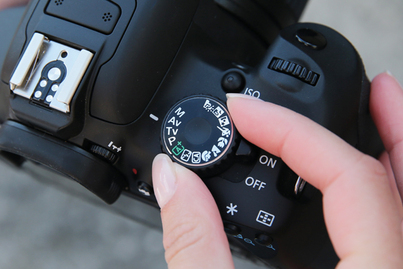
When DEPTH OF FIELD is most important to you, and you want to select your aperture (and let your camera do the rest), you should use Aperture Priority Exposure Mode. This is represented on your mode dial by "Av."
While you are in Av Mode, you can rotate your main dial (next to the shutter button) to quickly adjust your f-stop. You will see your f-stop value on the bottom of your viewfinder.
Remember, the lower the f-stop number (2.8) the LARGER your aperture and the SHALLOWER your depth of field.
The higher your f-stop number (22) the SMALLER your aperture and the WIDER your depth of field.
practice first!
Use this DSLR simulator to see what happens when you change your Aperture, distance and focal length. As you change them, notice how clear or blurry the background appears to be. Also notice that the lighting and ISO play a big part in your photo. What happens in Dim lighting? What happens with a high ISO? As you set up each shot, take a look at your exposure meter (in green at the bottom - center of the view finder), the arrow should line up in the center to produce a well - exposed shot.
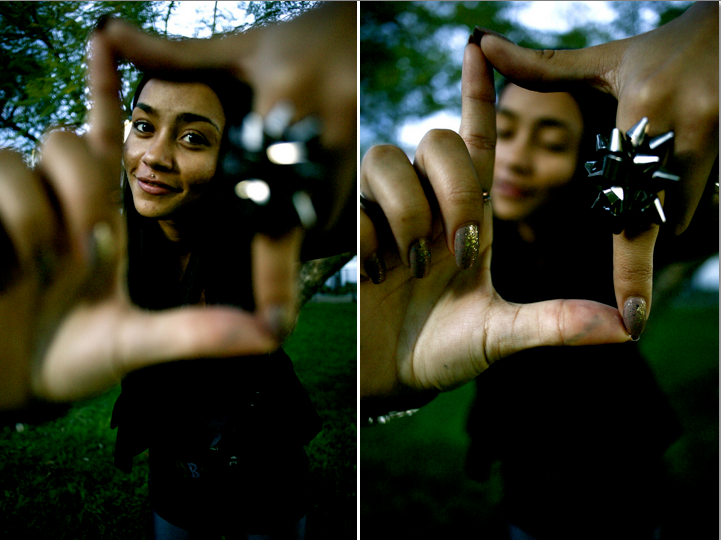
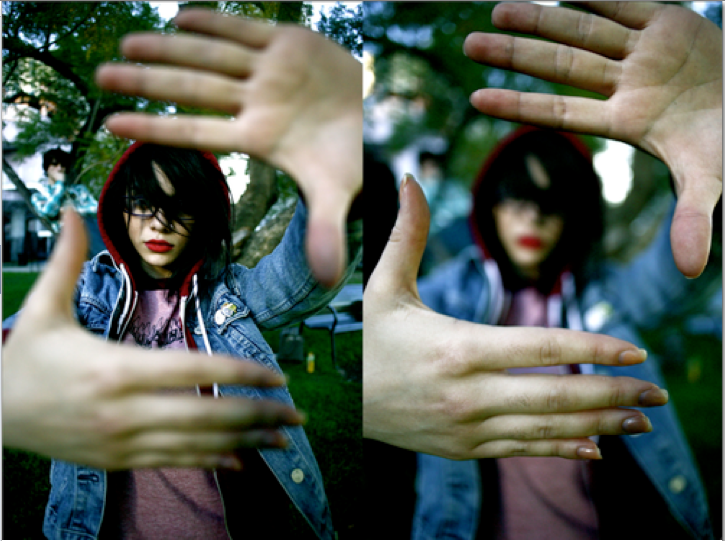
Depth of Field Assignment 1:
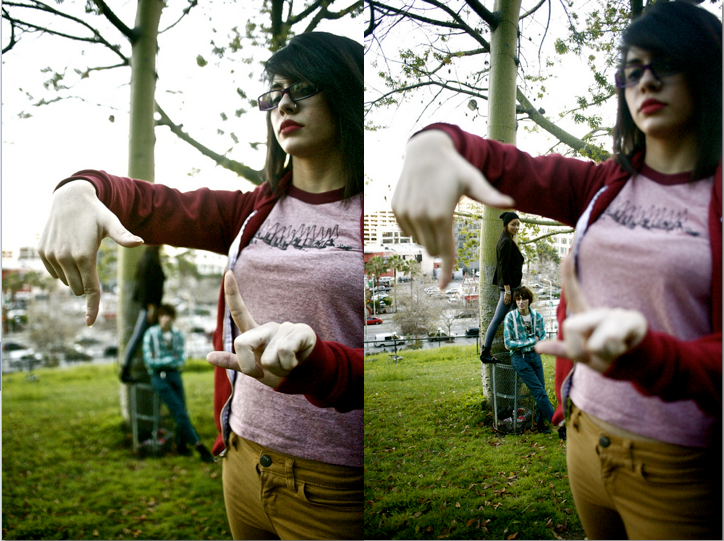
Set up a shot so that you have a subject in the foreground (close to you) and in the background (farther back). It can be two objects, two people or even one object or person that has a part of them/it closer to the camera and part farther back in space (for example, a person holding their hands out towards the camera to frame their face). Just make sure that you can see both the foreground and background subjects at the same time.
You will take 3 photographs of your subjects. Use a tripod and do not move your camera in between shots.
You will take 3 photographs of your subjects. Use a tripod and do not move your camera in between shots.
- SHOT 1: Use a small aperture (large f-stop #) to create a large depth of field. BOTH of your subjects should be in focus.
- SHOT 2: Use a large aperture (small f-stop #) to create a shallow depth of field. Use manual focus so that ONLY the subject in the FOREGROUND is in focus. The background subject should be blurry.
- SHOT 3: Use a large aperture (small f-stop #) to create a shallow depth of field. Use manual focus so that ONLY the subject in the BACKGROUND is in focus. The foreground subject should be blurry.
depth of field assignment 2:
For your second assignment, you will take a variety of creative photographs using shallow depth of field. You will need to use Av Mode on your camera and adjust your f-stop, ISO, distance and focal length for each shot. Get as many shots as you can with a variety of subjects- people, objects, plants, etc. Incorporate what you know about composition- use the shallow depth of field to create SIMPLICITY, and try to use rule of thirds, point of view, leading lines and framing where ever possible.
See Schoology.com for submission instructions.
See Schoology.com for submission instructions.
