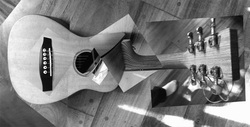
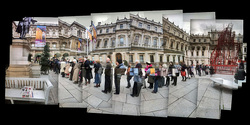
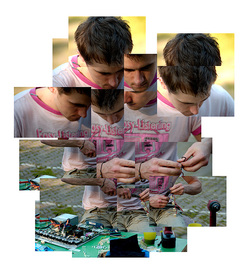
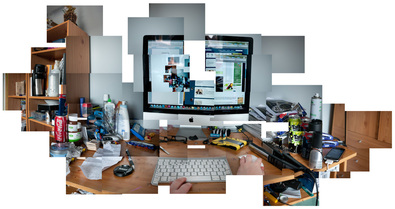
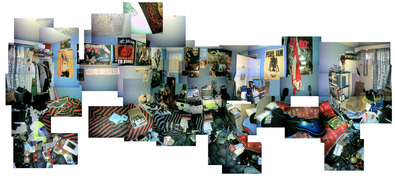
objectives: students will use layers in photoshop to combine multiple viewpoints of a subject into a single image, similar to david hockney's "joiners."
David Hockney
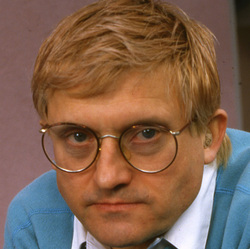
- Born 1937
- English painter, draughtsman, printmaker, stage designer and photographer.
- Interested in how 3-dimensional space can be portrayed in a 2-dimensional image.
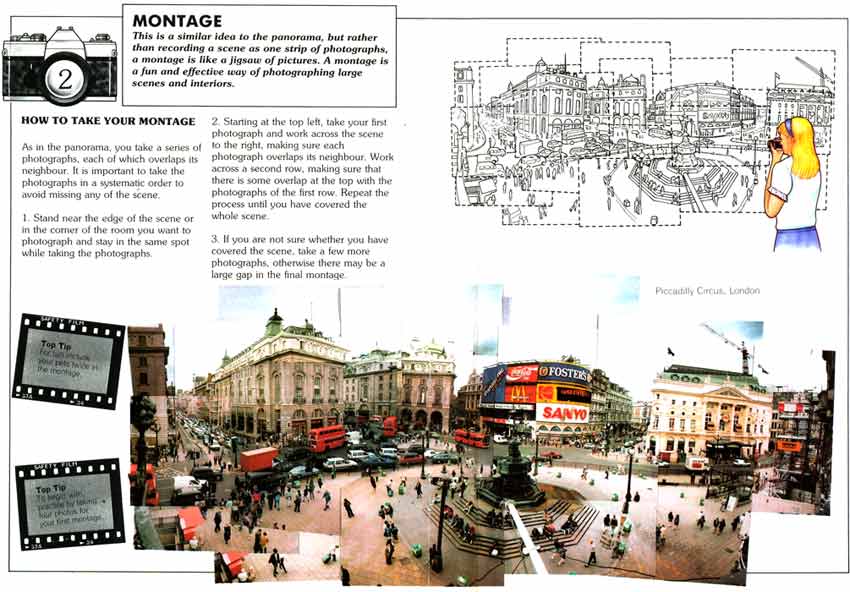
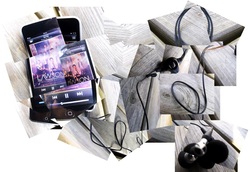
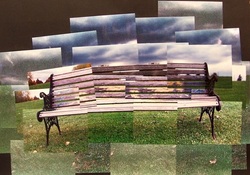
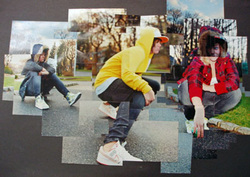
- Combined multiple viewpoints of a single subject into a photographic collage called a "joiner"
- Joiners aimed to create an image that was able to show reality how we experience it (in fragments, not as a whole), and to show the passage of time.
See how hockney creates his work...
Shooting Instructions
REQUIREMENTS FOR SHOOTING:
- Choose whatever subject you like- person, place, object, etc... (see ideas below)
- Shoot 2 different scenes, with a MINIMUM OF 40+ PHOTOS FOR EACH. (80 TOTAL) More is always better.
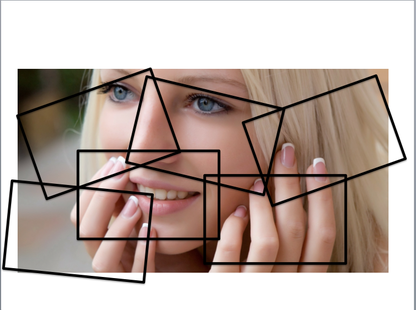
- ZOOM IN and shoot CLOSE UP shots of different fragments of your subject.
- Shoot the entire scene, try shooting a whole row across the top of your subject, then shoot a whole row below that, then below that, etc until you know you've covered you're whole subject.
- Each shot should OVERLAP the next, so that you don't have any gaps in your final piece.
- Don't move from where you are standing during the entire time you are shooting. Keep your zoom the same as well.
- Try tilting your camera left or right as you shoot to get interesting angles.
ideas for subject matter...
Choose 2 different subjects to shoot. Shoot a minimum of 40 photos for each. 80 total. More is always better.
Photoshop instructions
STEP 1: CREATE A FOLDER FOR YOUR PHOTOS!
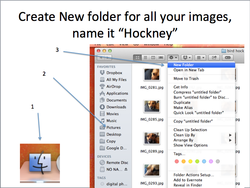
- First, create a folder with all of your 40+ photographs in it.
- Click on your finder in the bottom-left hand corner of your desktop. (Blue Face icon)
- On the left-hand side, click on your "Pictures" folder.
- Now click the Gear Button at the top.
- Select "New Folder" from the drop-down menu.
- Rename your new folder after the assignment- "Hockney Photos" or something similar.
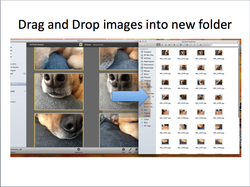
- To add your photos to the folder, keep your new "Hockney" folder open and visible on your desktop.
- Then open up iPhoto, highlight and drag and drop your photos from iPhoto into your new folder.
- Drag them ALL over, even if there are some you think you do not want to use.
- Then open up iPhoto, highlight and drag and drop your photos from iPhoto into your new folder.
- Drag them ALL over, even if there are some you think you do not want to use.
STEP 2: CREATE A NEW, BLANK CANVAS IN PHOTOSHOP!
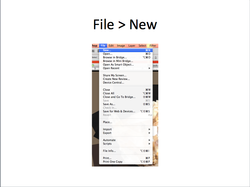
- Now open Photoshop.
- Create a new, blank canvas by going to FILE and then choose "New"
- Create a new, blank canvas by going to FILE and then choose "New"
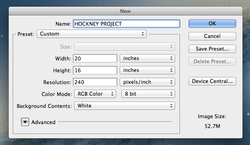
- Create a name for your new file "Hockney- Last Name"
- Make your width and height 16 by 20 inches (vertical) or 20 by 16 inches (horizontal).
- Make resolution 240 ppi (pixels/inch).
- Choose background contents.
- Click OK.
- Make your width and height 16 by 20 inches (vertical) or 20 by 16 inches (horizontal).
- Make resolution 240 ppi (pixels/inch).
- Choose background contents.
- Click OK.
STEP 3: DRAG AND DROP YOUR PHOTOS ONTO YOUR CANVAS
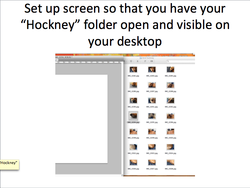
- Set up your screen so that you have your "Hockney" photo folder OPEN and VISIBLE on your desktop behind your photoshop workspace.
- Choose a photo from your Hockney folder and drag and drop it on top of your canvas in Photoshop.
- Choose a photo from your Hockney folder and drag and drop it on top of your canvas in Photoshop.
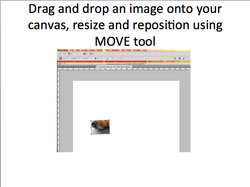
- Use your MOVE tool to RESIZE the image, MOVE it and ROTATE it to where you want it.
- Make sure you make it small enough that you can fit all of your other photos on the canvas.
-HINT: HOLD DOWN THE SHIFT KEY ON YOUR KEYBOARD WHILE YOU RESIZE YOUR IMAGE!!! This will keep the ratio the same as you re-size, so your image doesn't get "squooshed" or "stretched out" looking!
- Click the "Commit" Check Mark in your tool options bar when you are done re-positioning it.
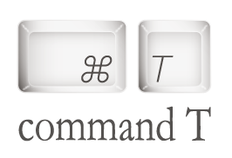
trouble re-sizing? hit "Command T" on your keyboard (free transform)
STEP 4: ADD A SHADOW TO YOUR PHOTO!
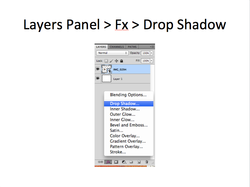
- To make it look more like an actual photo collage, we will add a shadow underneath each image.
- To do this, look in your layers panel and click on the FX button on the bottom.
- From the Fx menu, select "Drop Shadow"
- To do this, look in your layers panel and click on the FX button on the bottom.
- From the Fx menu, select "Drop Shadow"
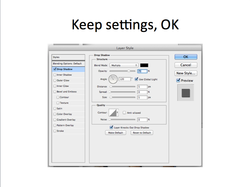
- You can keep the settings as they are, or if you want to, play around with them to change the size, direction and darkness of your shadow.
- When finished, click OK.
- When finished, click OK.
STEP 5: REPEAT STEPS 3 AND 4 WITH ALL OF YOUR OTHER PHOTOS UNTIL YOUR IMAGE IS COMPLETE!
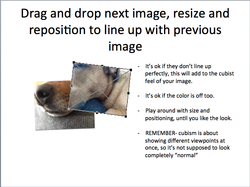
- Now you will select your next image from your Hockney folder and drag and drop it onto your canvas.
- Pick up your move tool and resize, move and rotate it so that it lines up with the image you placed before it.
- It is ok if the color or exposure doesn't match up exactly, it will add to the collage-feel of your piece.
HINT: if you shot your photos in a sequential way (in orderly rows for example) it will be much easier to place your photos, just go in order and place each photo next to the one before it.
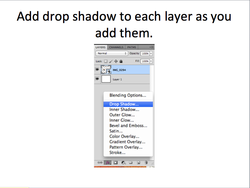
- Remember to add a drop shadow to EVERY PHOTO that you place.
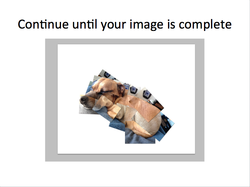
- Keep repeating these steps until your image is complete.
- You do not necessarily need to use ALL of the photos that you took, but you do not want any gaps in your image.
- You can include as much or as little of the background as you choose.
- You do not necessarily need to use ALL of the photos that you took, but you do not want any gaps in your image.
- You can include as much or as little of the background as you choose.
do you need to go back and re-adjust other layers???
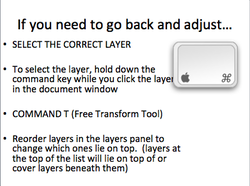
If you need to go back and edit a layer, first SELECT the correct layer from the layers panel.
TIP: to select a layer to move, hold down the command key while you click the layer in your document window.
Then, use "Free Transform" to resize, move or rotate it. Do this by hitting Command T on your keyboard.
You can also REORDER your layers. The layers at the top of your layer panel will cover the ones underneath them. To bring a bottom layer to the top, drag to the top of your layer panel!
STEP 6: resize and/or center your collage on your canvas!
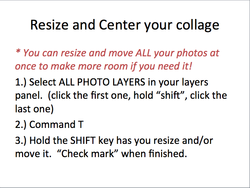
- Once all of your photos are placed, you may need to center your images in the middle of your canvas if they are off to one side, or may need to make the entire collage bigger or smaller to better fit the canvas. To do this, follow these steps:
1. Select all PHOTO layers in your layers panel by clicking the first one, then hold SHIFT key, then click last photo layer. This will highlight them all. (do not select the background layer)
2.) Command T
3.) Hold the SHIFT KEY to resize, and move collage into center of the canvas. Hit CHECKMARK when finished.
STEP 7: CHANGE YOUR BACKGROUND COLOR!
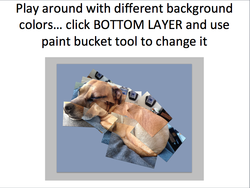
- At this point you may want to experiment a little bit with background colors to see what looks best.
- To do this, scroll down on your layers panel and select your background (bottom-most) layer.
- Select a color and use your paint bucket tool to fill with a different color.
- To do this, scroll down on your layers panel and select your background (bottom-most) layer.
- Select a color and use your paint bucket tool to fill with a different color.
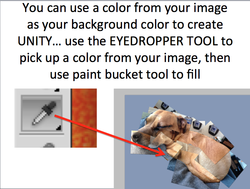
- You can pick out a color from your photographs to use as your background color if you want.
- Sometimes, choosing a background color that is already present in your image can help create UNITY (feeling that everything "goes together")
- To do this, pick up your EYEDROPPER tool and click anywhere on your image to choose that color.
- Then, switch back to your paint bucket tool to fill the background with that color.
- I used a blue shade found in the couch for my background.
STEP 8: SAVE AND TURN-IN TO SCHOOLOGY!
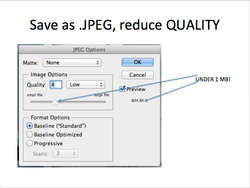
- When finished, go to FILE > SAVE AS and save your image as a .JPEG in your PICTURES FOLDER.
- Click OK.
- When the ".JPEG Options" box pops up, REDUCE YOUR IMAGE QUALITY to decrease the file size.
- Notice what size your file is on the right-hand side of the box, you want to reduce quality until it is under 1 MB.
- Then click OK.
- Click OK.
- When the ".JPEG Options" box pops up, REDUCE YOUR IMAGE QUALITY to decrease the file size.
- Notice what size your file is on the right-hand side of the box, you want to reduce quality until it is under 1 MB.
- Then click OK.
