objective: Students will understand how shutter speed affects motion and will use tv autoexposure mode to manipulate how motion is captured in a series of images.
capturing motion
Photographers have two primary options when capturing motion. They may wish to "freeze" the action exactly at a specific moment, or they may choose to purposely "blur" the motion to emphasize the movement or speed of their subject.
Both options require the photographer to manipulate the shutter speed to achieve the desired effect.
Both options require the photographer to manipulate the shutter speed to achieve the desired effect.
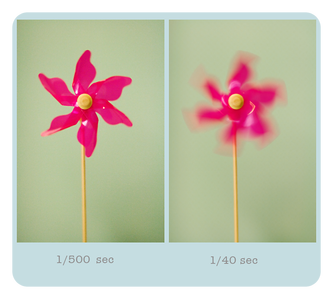
How shutter speed affects motion:
In short, the faster your shutter speed, the sharper your image will be. The slower your shutter speed, the more motion blur you will get.
REMINDER:
Keep in mind that shutter speed not only affects motion, but exposure as well. The faster your shutter speed, the less light can enter your camera. The slower your shutter speed, the more light will enter your camera. This is important to consider, especially if you plan to use a very fast shutter speed when there is not much light, or a very slow shutter speed in bright daylight.
Keep in mind that shutter speed not only affects motion, but exposure as well. The faster your shutter speed, the less light can enter your camera. The slower your shutter speed, the more light will enter your camera. This is important to consider, especially if you plan to use a very fast shutter speed when there is not much light, or a very slow shutter speed in bright daylight.
set your camera to time value mode (tv)
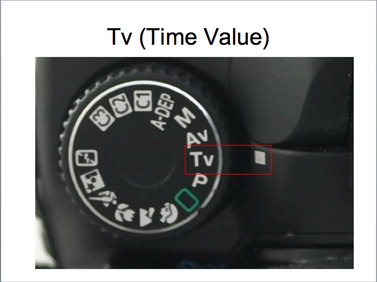
Time Value Mode lets you control the shutter speed using the dial next to your shutter button.
While in TV mode, your camera will automatically select your aperture (f-stop) for you, to try to balance out your exposure.
You will still need to set your ISO.
ISO- higher if shooting inside or using a fast shutter speed (try 800 or auto), lower if shooting outside or with a slower shutter speed (100-200)
practice!
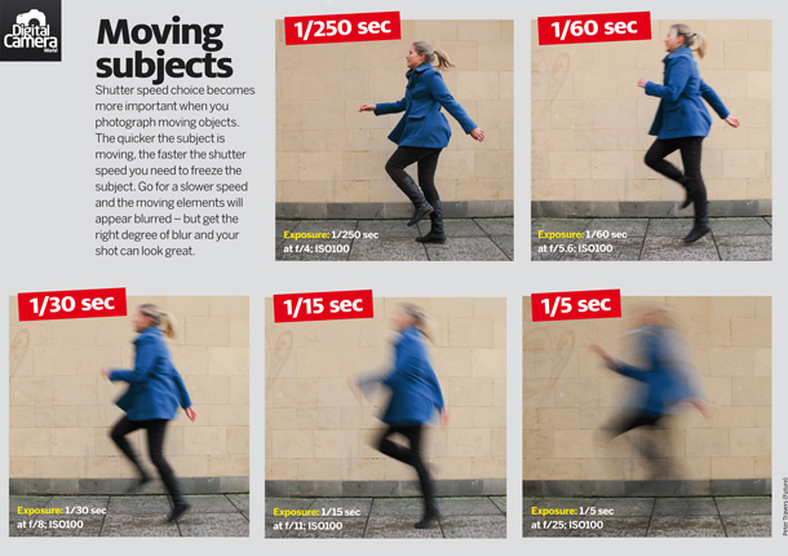
Practice using Shutter Priority Mode on the DSLR simulator below. Notice how the girl's motion is effected by faster shutter speeds and by slower shutter speeds. Also notice how lighting and ISO affect the image as well. Always check your exposure meter at the bottom-center of your viewfinder before taking your shot to make sure it will be properly exposed.
Day 1 assignments:
Today you will capture a moving subject with a fast shutter speed and again with a slow shutter speed to compare how motion is affected. Go outside and have a model jump, run, flip, dance, or do anything that includes motion! Other possible subjects could be a pinwheel blowing in the wind, a ball being thrown in the air, leaves being thrown in the air, etc. Be creative!
freeze action shot
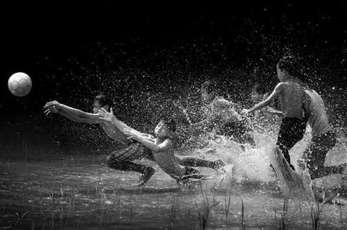
To freeze action and keep your moving subject(s) sharp you will need a fast shutter speed. The faster your subject is moving, the faster your shutter speed will need to be.
1/250th of a second is usually fast enough to freeze motion.
1/500th of a second is fast enough to freeze a moving athlete.
1/1000 of a second may be needed for even faster subjects, such as fast moving vehicles.
1/250th of a second is usually fast enough to freeze motion.
1/500th of a second is fast enough to freeze a moving athlete.
1/1000 of a second may be needed for even faster subjects, such as fast moving vehicles.
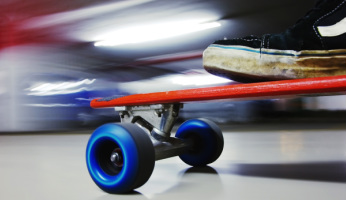
Motion blur shot
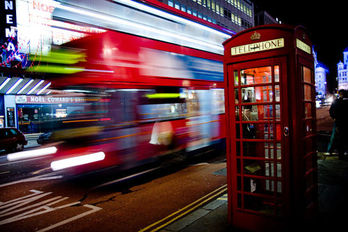
In a motion blur image, the moving subject should appear blurry, while the background remains sharp.
A slower shutter speed allows the subject to move while the camera is still recording the image, causing a blurred effect. The slower your subject is moving, the slower your shutter speed will need to be to produce a blur.
Any time you are using a shutter speed of 1/30th of second or slower, a TRIPOD IS REQUIRED. This is because during that long of an exposure, camera shake will occur from hand-holding your camera. This will produce an image that is blurry all over (not what we want!) instead of just the moving subject.
Day 2 Assignments:
Today focus on using fast shutter speeds to create FREEZE ACTION SHOTS. With your group, take turns being the "model." Take action shots of the model running (across the frame, not towards you or away from you) and jumping. Then get creative and take a freeze action shot of a moving OBJECT (water, ball, pinwheel, spinning quarter, etc.) Each photo should be perfectly SHARP! NO MOTION BLUR!
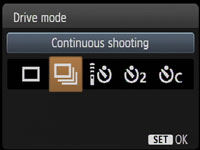
Click on your "Drive Mode" button (left arrow key).
Choose "Continuous"
When you press and hold shutter, your camera will continually shoot.
Choose "Continuous"
When you press and hold shutter, your camera will continually shoot.
TAKE SEVERAL SHOTS OF EACH. GET CREATIVE! THINK ABOUT YOUR COMPOSITION...
A PERSON RUNNING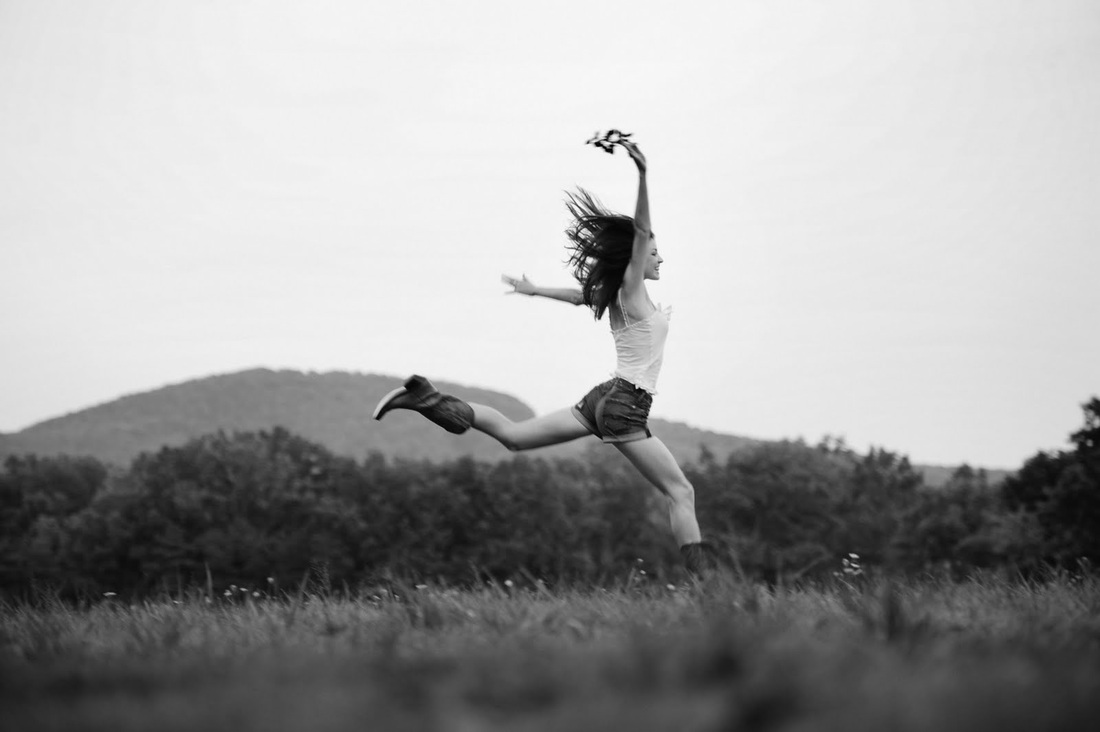
|
A PERSON JUMPING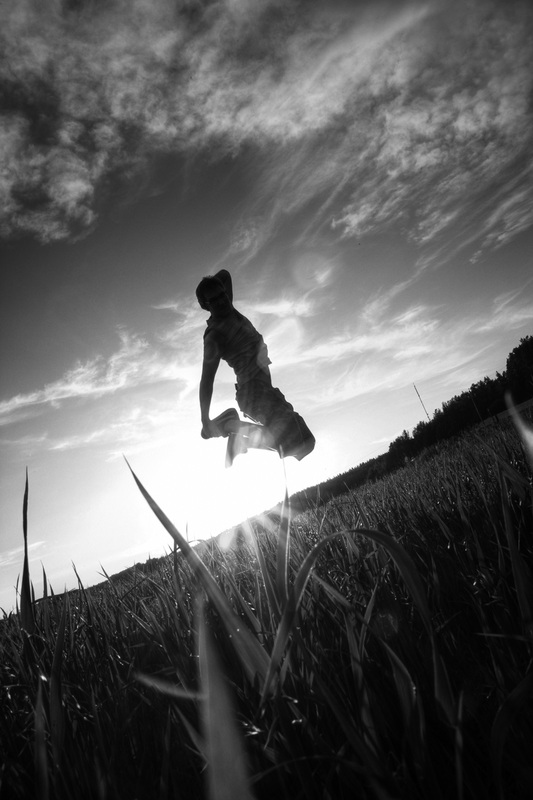
|
A MOVING OBJECT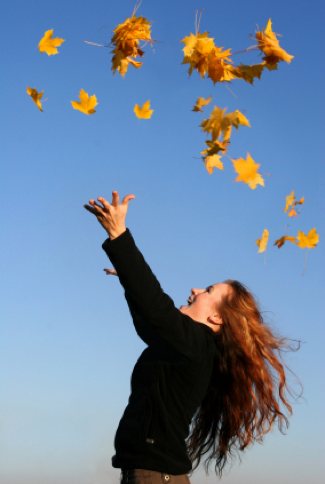
|
Day 3 assignments:
Today we will explore another approach to creating motion blur in our images: panning. You will need to shoot a moving subject. Read below for instructions.
Panning
Panning is another approach to capturing motion blur. Here, instead of having the moving subject blurry and the background sharp, the opposite is true- the background is blurred and the moving subject is clear.
This is achieved by using a slow shutter speed and following the moving subject with your camera, just as you would pan a video camera if you were filming someone running past you. Because your camera stays aligned with the moving subject, it should stay sharp.
Use Tv Mode, and go for a slower shutter speed, but not TOO slow (to avoid camera shake). Try 1/30 to start with and experiment from there.

Click on your "Drive Mode" button (left arrow key).
Choose "Continuous" When you press and hold shutter, your camera will continually shoot. |
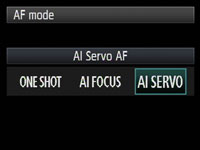
Click on your "AF Mode" button (right arrow key).
Choose AI Servo Now your camera will continually focus on your subject as it moves across the frame. |
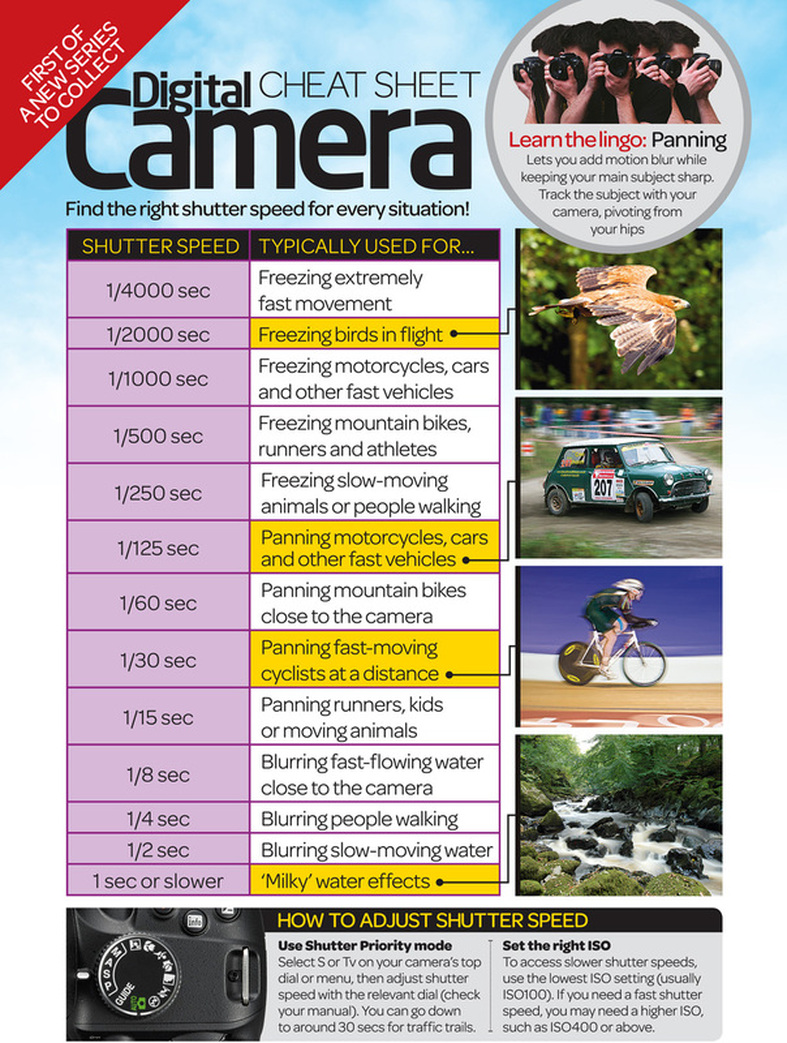
helpful shutter speed cheat sheet!