Mrs. Cook's Art Class
  • Home
  • Digital Photo
    • Welcome to Digital Photo
    • Schoology
    • Your first homework assignment...
    • Friday Photo Challenge
    • BASIC EDITS 2
    • Creating a Contact Sheet
    • How to Critique
    • My Life My Art
    • History of Photography
    • Camera Basics
    • Photo Scavenger Hunt
    • Letter Hunt
    • Letter Hunt Digital
    • Composition Tips
    • Composition
    • Exposure Triangle >
      • Depth of Field
      • Depth of Field via Photoshop
      • Macro Photography
      • Bokeh
      • Bokeh and Photoshop
      • Bokeh Shapes
      • Motion
      • Photoshop Motion Blur
      • Light Painting
      • Water Drop Photography
      • Ink Photography
      • Smoke Photography
      • Manual Mode
    • Respect Poster
    • Self-Portrait
    • Famous Photographers >
      • Muybridge Photo Sequence
      • Muybridge GIF
      • Stieglitz
      • Ansel Adams
      • Ansel Adams Advanced
      • Avedon
      • Hockney Joiner
      • Obey >
        • Obey Clip
    • Artist Inspiration
    • Mid-Term Project
    • Elements of Art
    • Principles of Design
    • HDR
    • Lomography
    • Selective Color
    • Photo Mandala
    • Refine Edge
    • Mini Planet
    • Tunnel Books
    • Double Exposure
    • Levitation
    • Multiple Personalities
    • Changing Seasons
    • scribble portrait
    • Watercolor Portrait
    • Student Gallery
    • Class Information
  • Applied & Cultural Arts
    • Anchor Activities >
      • ANCHOR: Bead Loom
      • Navajo Loom Weaving
    • Wind Chimes
    • Basket Weaving
    • Middle Eastern Kaleidoscope Tile
    • Pop Art Sculpture
    • Yarn Coil Baskets
    • Respect Zentangle
  • Studio Art
    • Contour Line
    • Scratch Board
    • Respect Zentangle
    • Value
    • Pastel
    • Sketchbook Assignments
    • Forms

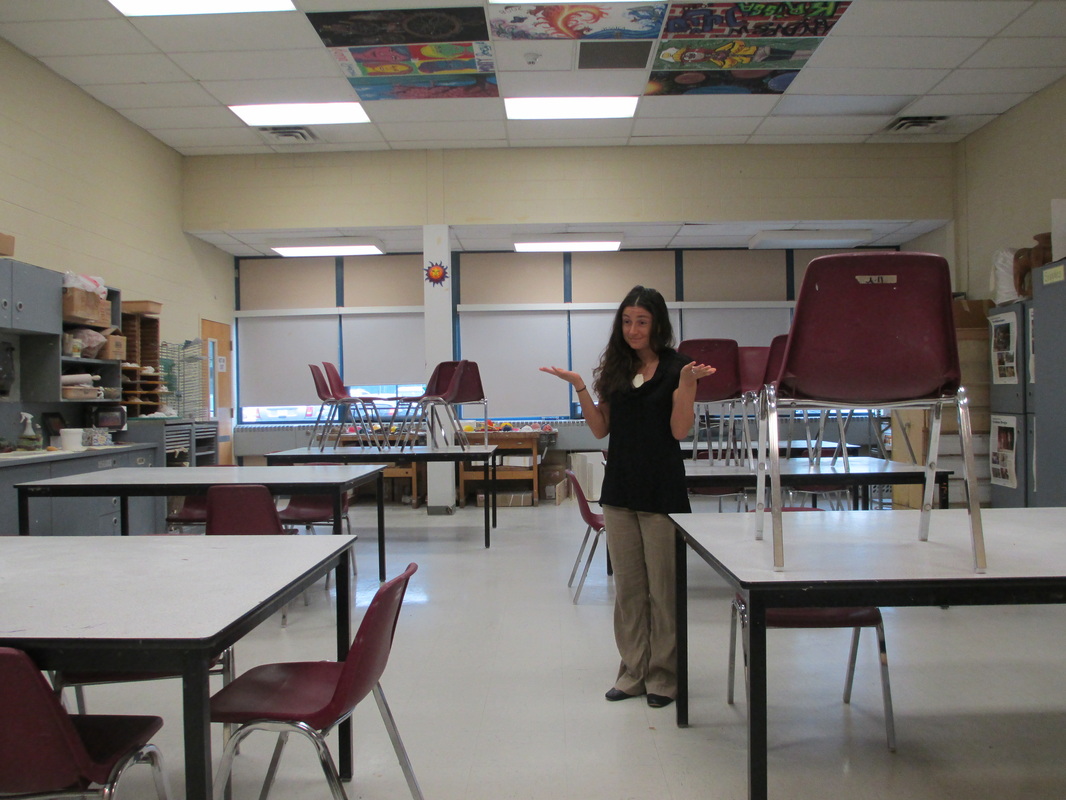
Objective:  Students will use the quick selection tool and layer masks in photoshop to combine several photographs into one.


Examples:

How it works:

Picture
              

Picture
Picture


Picture
Picture

Shooting Instructions:

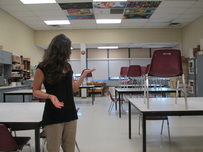
  • Use a tripod for all shots.
  • Do not move camera in between shots.
  • Use a self-timer (2 seconds or 10 seconds).
  • Take a minimum of 4 shots.
  • You do not need a plain background photo for this project.  You will be in all 4 shots.
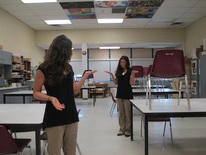
  • Come up with an interesting concept.  Pose in different parts of the frame- farther back, closer, etc.
  • Try interacting with yourself.  Anticipate where you will be next and look in that direction to interact with yourself.
  • Make sure all 4 shots are properly exposed (not too light or dark) and are all in focus.

Photoshop instructions:
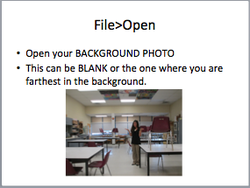
Picture
  • File > Open
  • Choose BACKGROUND PHOTO
  • This can be the one in which you are farthest in the background, or a totally blank background without you in it.
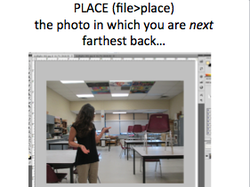
Picture
  • File > Place
  • Choose NEXT PHOTO.  
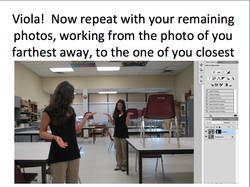
  • Work from BACKGROUND TO FOREGROUND.

Picture
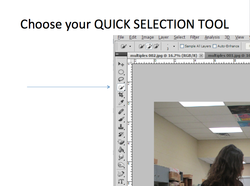
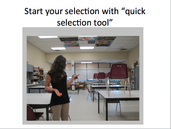
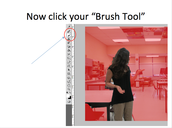
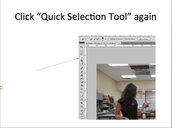
  • Pick up your Quick Selection Tool.
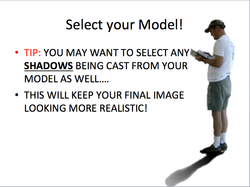
Picture
  • Select your model.
  • Also select any props/objects your model may be holding.
  • Also select any shadows being cast from your model.
  • If your model is seated in a desk or chair, select that desk/chair along with your model.

using the quick selection tool- tips and tricks:

Picture
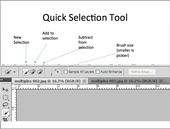
Quick Selection Options

Picture
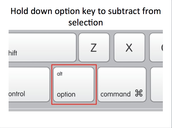
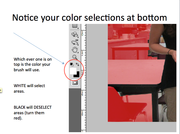
Hold option to deselect

Picture
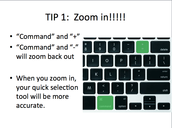
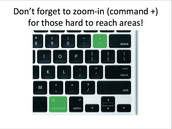
Zoom in on small areas.

Picture
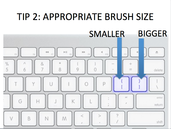
Use smaller brush for detailed areas.

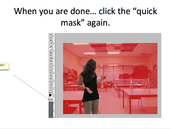
optional: use a "Quick mask" to fine-tune your selection

Picture
1

Picture
5

Picture
2

Picture
6

Picture
3

Picture
7

Picture
4

Picture
8

Picture
  • When you are happy with your selection, click on "Refine Edge" (found in the option bar) (If you do not see it, make sure you have your quick selection tool selected.)

Picture
  • Refine the radius around your hair (if you have longer hair)
  • Click Smart Radius.
  • Increase radius.
  • Use the refine radius tool to "paint" around the loose edges of your hair to refine the edges.
  • Click OK when done.

Picture
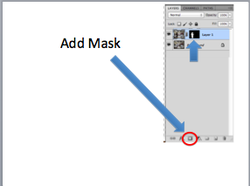
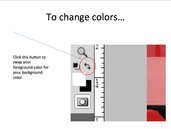
  • With your model still selected (marching ants going around edges), click the Add Mask button at the bottom of your layers panel.
  • You will see the mask icon pop up next to your layer thumbnail with your selection in white and the background in black.

Picture

  • Follow the steps above with all of your remaining images until you have a total of 4 or more "multiples" in your background image.

Picture
  • If you have mistakes or you have hard edges that need to be "blended out" you can paint on your mask to fix it.
  • Make sure you are clicked on the MASK, not the photo thumbnail.
  • Use your PAINTBRUSH
  • Black paint will hide more of that layer, White paint will reveal that layer.
  • Use 50% opacity and a 0% hardness brush to blend out edges.
Picture
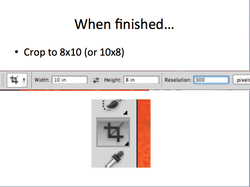
  • When finished, CROP YOU IMAGE.
  • There is no need to crop each layer, cropping one will crop them all.
  • Crop it to 8x10 inches for a vertical image, or 10x8 inches for a horizontal image.
  • Resolution: 300
  • Click on your image and drag out your crop box.
  • Hit enter or the "Confirm" Check mark to confirm crop selection.

sAVE FINAL IMage as a .jpeg to your pictures folder and see schoology.com for turn-in instructions!

Powered by Create your own unique website with customizable templates.