Objectives:
Students will understand and use radial symmetry to create a mandala.
Students will use layers, blend modes and transform in photoshop to create a mandala.
What is a mandala?
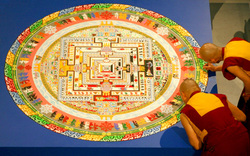
Mandala is the Sanskrit (Ancient Indian) word for "circle." It is a spiritual and ritual symbol in Hinduism and Buddhism, representing the Universe.
Mandalas are usually circular with a center point and exhibit RADIAL BALANCE. Radial balance describes when all elements "radiate" out from a center point.
In various spiritual traditions, mandalas may be employed as a spiritual teaching tool, for establishing a sacred space, and as an aid to meditation and trance induction.
Your Assignment:
You are going to use Photoshop to create a mandala with radial balance from a photograph you have taken. Then, you will take your final image and transfer it to a ceramic tile!
|
|
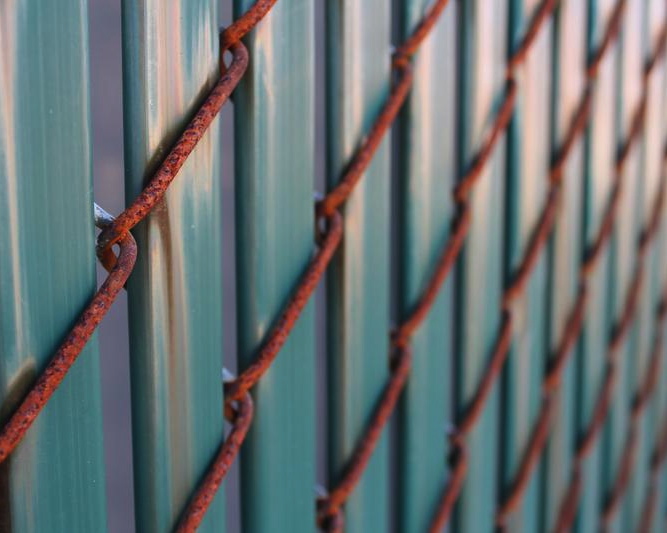
CHOSE A PHOTO THAT HAS...
- LOTS OF BRIGHT COLORS
- CONTRASTING COLORS
- BOLD LINES
- BOLD SHAPES
photoshop instructions
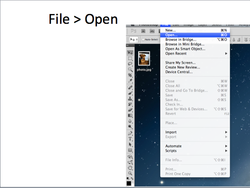
- File > Open
- Choose File, OK
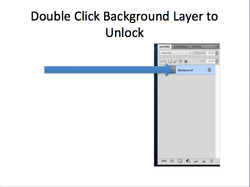
- Find your layers panel in the bottom, right-hand corner of your workspace.
- Double-click on the "background" layer to unlock it.
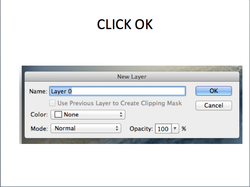
- Click OK
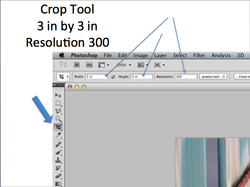
- Select your crop tool from the tool bar on the left-hand side of your screen (4th one down)
- At the top of your workspace, in the "tool options bar" type "3 in" for width and 3 in" for height.
- Type 300 for resolution.
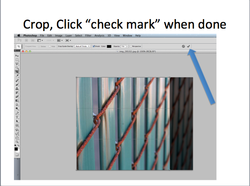
- Outline the portion of your photograph you would like to focus on.
- Click the check mark (commit button) to save your selection.

- Image > Canvas Size...
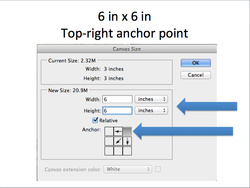
- Change the width and height to "6 inches"
- Where it says "Anchor" click the top-right corner box.
- Hit ok.
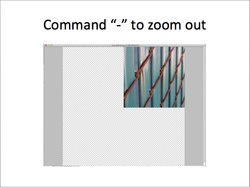
- If you like, hit the command key and minus (-) sign on your key board a few times to zoom out so you can see your entire canvas.

- View > Rulers
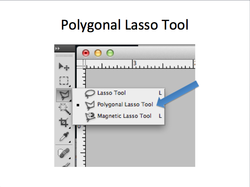
- Select your "Polygonal Lasso Tool"
- It is the 3rd tool down from the top, in your tools bar.
- You may have to click and hold the Lasso tool down, until menu pops up with more options, then choose "Polygonal Lasso Tool"
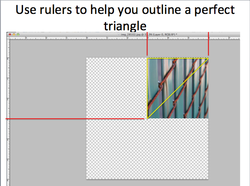
- You will use this tool to outline a triangular selection of your photograph.
- Start by clicking in one of the corners of your photograph. Use the rulers to help make sure you are aligned with the actual corner.
- Then, move your mouse to the adjacent corner and click again. (Again, check the measurement on the ruler to ensure that you are clicking on the actual corner)
- Then, move your mouse across the center of your photograph to the corner diagonally across from your last corner, click again. (Use ruler!)
- Finally, move your mouse back to your original corner and click where you started.
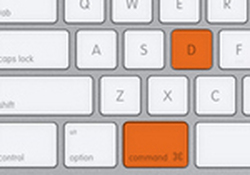
- If you messed up, hit Command D to deselect your selection and start over.
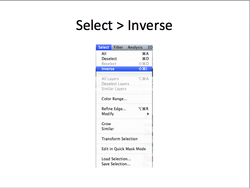
- Select > Inverse
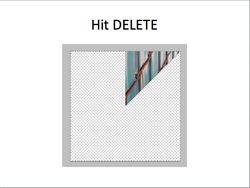
- Hit the delete key on your keyboard.
- You should be left with just the triangle you selected.
- You may notice that the section you just selected is still selected (lit up and blinking)
- Hit Command and "D" on your keyboard to deselect that area.
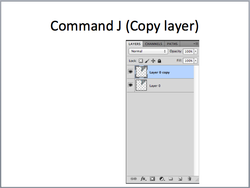
- Hit Command J on your keyboard to duplicate your layer.
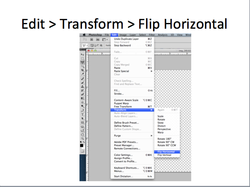
- Edit > Transform > Flip Horizontal
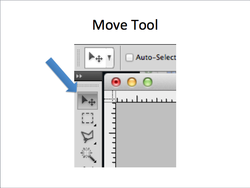
- Select your move tool.
- It is the first one at the top of your tools bar.
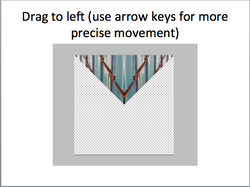
- Drag your triangle into place.
- You can also use the up, down, right and left arrow keys on your keyboard to make smaller, more precise movements.
- Make sure your triangles are perfectly lined up and there are no gaps or overlaps.
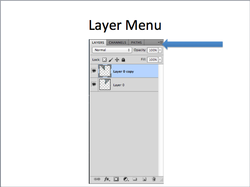
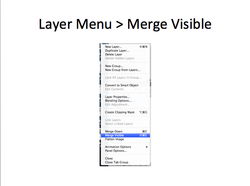
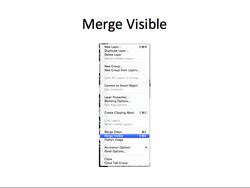
- Click your layer menu.
- It is in the top, right-hand corner of your layers panel.
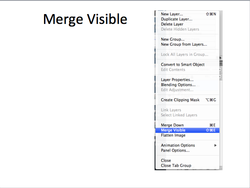
- Select "Merge Visible"
- You should now only have one layer.
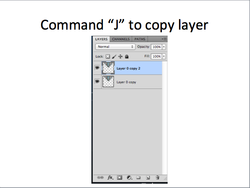
- Press command J on your keyboard to duplicate your layer.
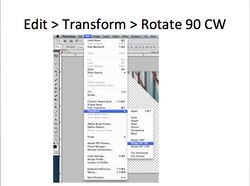
- Edit > Transform > Rotate 90 Degrees CW
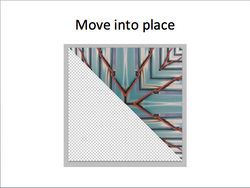
- Move it into place with the move tool or keys on your keyboard.
- Make sure it is lined up perfectly- no gaps, no overlapping.
- Go to your layer menu again.
- Choose "Merge Visible" again.
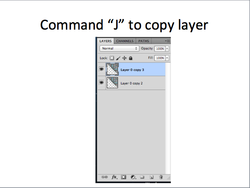
Hit "command J" on your keyboard to duplicate your layer.
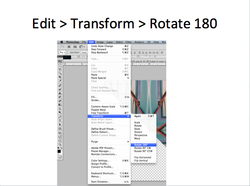
- Edit > Transform > Rotate 180 Degrees
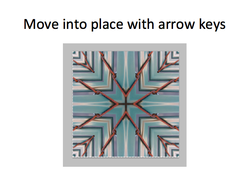
- Move it into place with move tool or arrow keys on keyboard.
- Make sure it is lined up perfectly, go gaps, no overlapping.
- If you like the look of your mandala as it is, then THAT'S IT! YOUR DONE!
- If you want to experiment more and push it a bit further... see below!
optional: take it one step further...
(You can always easily undo it if you don't like it!)
- Merge your layers by going to your layer menu and selecting merge visible.
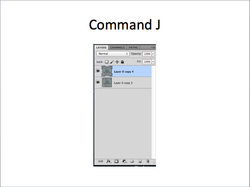
- Duplicate your layer by hitting command J on your keyboard.
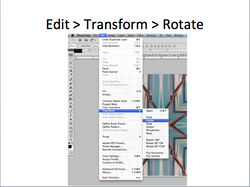
- Edit > Transform > Rotate
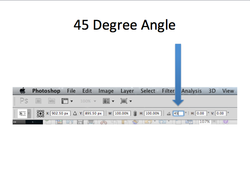
- At the top, in your tools option bar, find the white box with the diagram of an angle next to it. (third one from the right)
- Enter in "45"
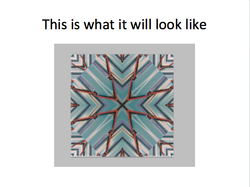
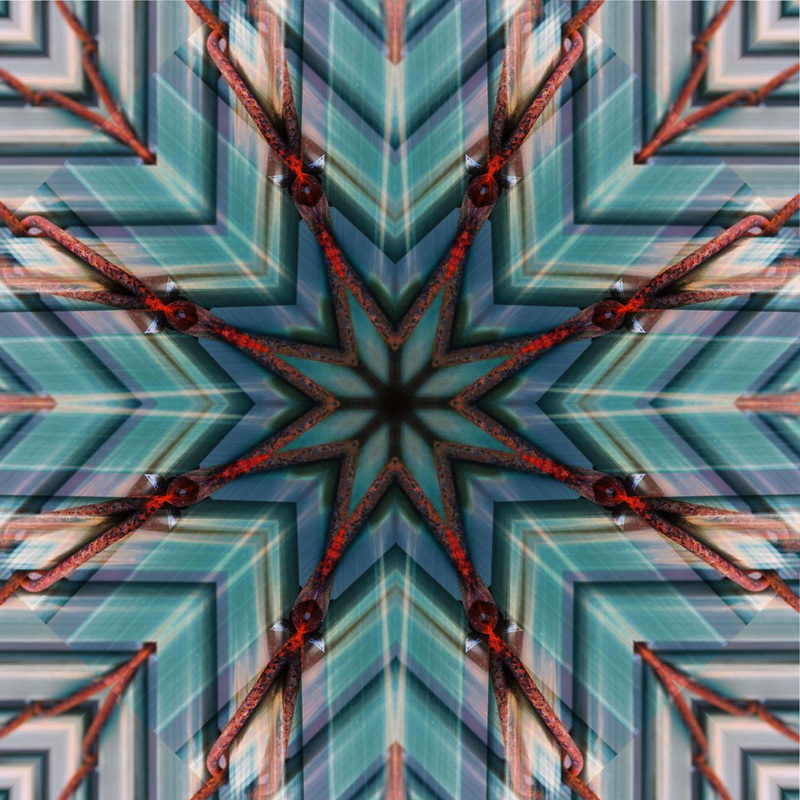
- This is what it should look like.

- Now find your "Layer Blending Modes" at the top, left-hand corner of your layers panel.
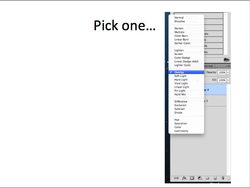
- Look through the different blending modes and select one that you like, its up to you!
if you have "Funky edges"....
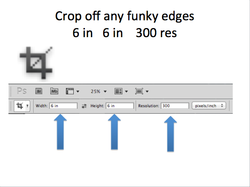
- If you have funky edges (white and gray checkers showing), crop it off so that its nice and even!
- Choose your crop tool
- CHANGE THE HEIGHT AND WIDTH TO SAY 6 IN
- Click on your image and drag out your crop box, cropping out the uneven edges.
- Commit to save (click check mark button at top)
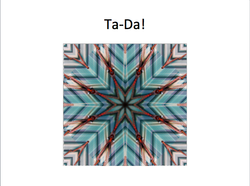
- You're done!!
save your work!
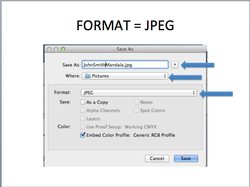
- Remember to always save your photoshop work twice.
- Once as a .PSD (photoshop document)
- Once as a .JPEG.
- ONLY UPLOAD .JPEGs to WEBSITE! NEVER .PSDs.
Print out!
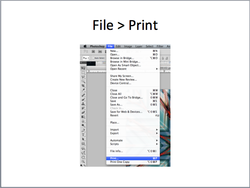
- ONLY PRINT OUT YOUR 1 BEST MANDALA
- Go to file > Print.

- Select printer ending in ".76"
- Hit Print.
- Get mandala from printer, check that it printed out ok, put name on back and give to me.
make tile!

- Neatly cut out your mandala, leaving no white edges.
- Cover your ceramic tile in a thick coating of "matte medium."
- Carefully center and place photograph on top of tile.
- Smooth out photo with your hand to remove any air bubbles.
- Put a coat of matte medium over the top of your image.
- HINT: use brush lightly and do not over-do it, you will start to remove parts of your image.
- Let dry.
