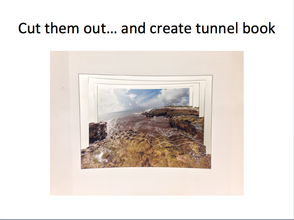
objectives: students will use the quick selection tool in adobe photoshop to create a 3-d tunnel book from a photograph that they have taken.
Your assignment:
You will take a photograph and then use Adobe Photoshop to separate it into 5 different layers, from foreground- to background. We will then construct an accordion-style box with the different photograph layers to create a 3-D tunnel book!

|
|
|
|
|
step one: take a photograph
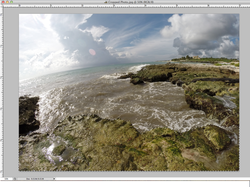
What makes a good photograph?
- Your scene should have a strong foreground, middle ground, and background, with important elements at various distances going back into space.
- Your photograph should employ lots of FRAMING (having elements around the edges of your photograph. In order for our book to work, you will need to have the sections of the photograph you wish to have in each section connected to at least one edge of your photograph.
- LARGE DEPTH OF FIELD. You want all of the elements in your photograph SHARP from foreground, to background. Be sure to use a shorter focal length (zoom out) and use a smaller aperture (higher f/stop number).
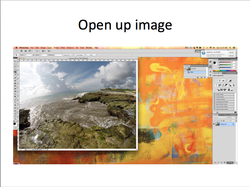
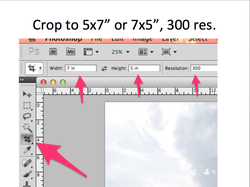
photoshop INSTRUCTIONS
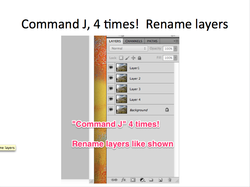
STEP 1: OPEN, CROP AND DUPLICATE YOUR ORIGINAL IMAGE
STEP 2: Create layer 1 by selecting only the closest objects in the foreground
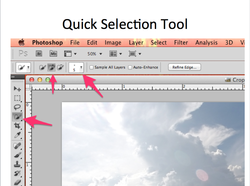
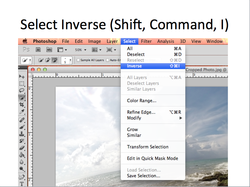
STEP 3: invert your selection
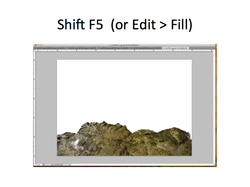
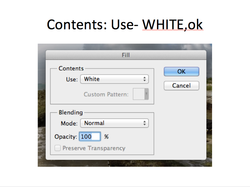
STEP 4: fill bACKGROUND WITH WHITE
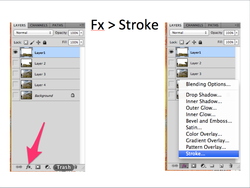
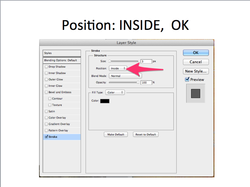
STEP 5: ADD OUTLINE AROUND LAYER
repeat steps 2-5 for layers 2, 3, & 4
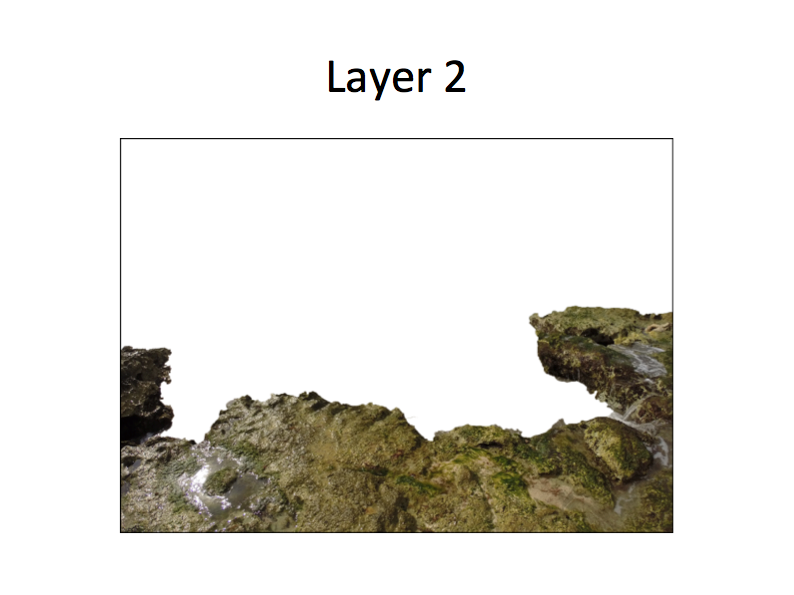
- Layer 2 should include EVERYTHING you selected in layer 1, plus a bit more (going back in space).
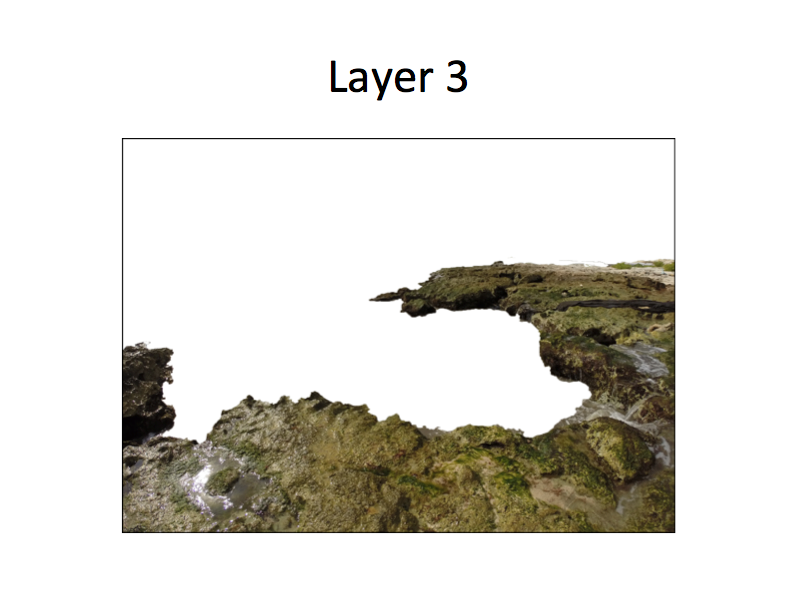
- Layer 3 should include EVERYTHING you selected in layer 2, plus a bit more (going back in space).
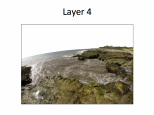
- Layer 4 should include EVERYTHING you selected in layer 3, plus a bit more (going back in space).
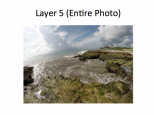
- Layer 5 (background layer in photoshop) will be LEFT ALONE. It will be the original picture, with everything included. You do not need to make any selections/edits to this layer in Photoshop (besides the crop we did in step 1).
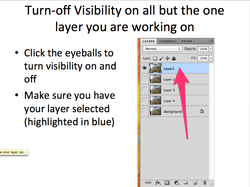
- REMEMBER TO SELECT THE LAYER YOU ARE WORKING ON (click to highlight in blue)
- REMEMBER TO TURN THE VISIBILITY (eyeball) ON FOR THE LAYER YOU ARE WORKING WITH, AND TURN THE VISIBILITY OFF FOR ALL OTHER LAYERS!
SAVE YOUR LAYERS AS A .PSD (PHOTOSHOP DOCUMENT) NOT .JPEG.
YOU WILL NOT BE TURNING THIS IN VIA EDMODO SO NO .JPEG IS NECESSARY.
PRINTING
Only the layers that are VISIBLE (eye ball showing) will print.
You will need to print each layer individually, so turn off the visibility off of ALL layers EXCEPT the one that you would like to print.
FOR A SHORTCUT, HOLD DOWN THE "OPTION KEY" WHILE YOU CLICK ON AN EYE BALL. That will turn on the visibility for only that layer. Then print that layer. Then, turn on the visibility for the next layer (option-click the eye ball for the next layer), then print, and so on...
For each layer, go to File, then print. Print it with the standard settings selected.
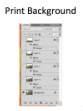
"Eye" only on background
|
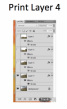
"Eye" only on layer 4
|
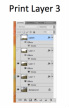
"Eye" only on layer 3
|
"Eye" only on layer 2
|
"Eye" only on layer 1
|
assembling your tunnel book
Instructions for assembly will be demonstrated in class.
