objective: students will understand how to refine the edge of a selection
photoshop instructions
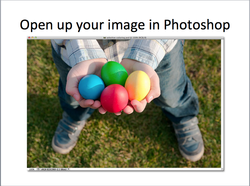
- Open up photo in Photoshop.
- File > Open
step 1: select area to remain in color

- Select the areas of you photo that you would like to remain in color.
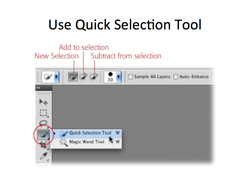
- Use the quick selection Tool.
- Use a smaller brush size for detailed areas.
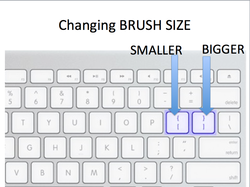
- Left Bracket Key = decrease brush size.
- Right Bracket Key = increase brush size.
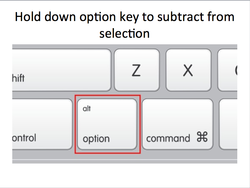
- Make a mistake? Hold down the option key and click to deselect or subtract from an area you selected by accident.
tip: Do you have very detailed edges that are tricky to select (like hair/fur)?
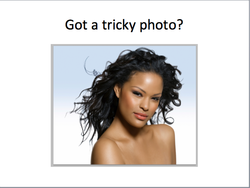
- Certain edges can be very difficult to select- like hair (shown here), fur, or foliage/leaves.
- If you have a tricky edge with lots of fine detail in your image, here is how to select it...
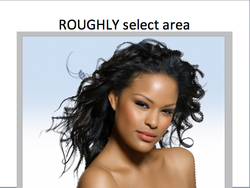
- Roughly select your subject.
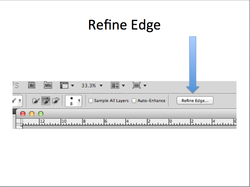
- Now, in your options tool bar, select REFINE EDGE.
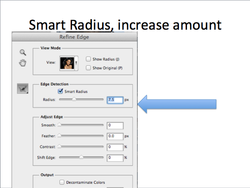
- Check off "smart radius"
- Increase radius amount, as you do, you should see more of your subject's edge being selected.
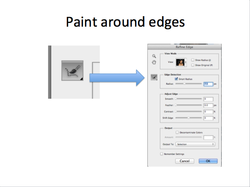
- Now pick up the paintbrush.
- Paint around the difficult edges.
- Left and Right Bracket Keys will change your brush size.

- In the "View Mode" you can change how you view your selection so that it is easier to see what you are "picking up"
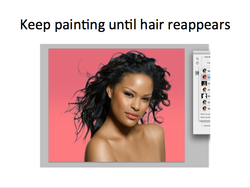
- Keep painting until all of your edges are selected.
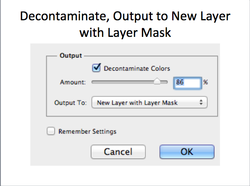
- When finished, at the bottom of the refine edge box, check "Decontaminate Colors"
- This will remove any background color that is still being picked up around the edges.
- In the "output to" drop down box- select "New Layer with Layer Mask"
- Your selection appears as a new layer with the background masked out.
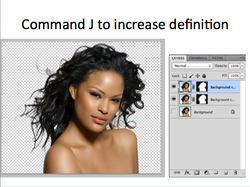
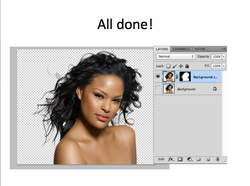
- If you make a copy of this new layer (Command J), you will increase the definition a bit.
- Now Click on your background layer, turn on its visibility, and SKIP TO STEP 3!
step 2: invert selection
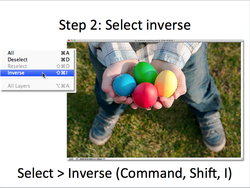
- Select the inverse.
- Go to Select at the top, and scroll down to select "inverse"
- OR use the keyboard shortcut: Command, Shift, i
step 3: black and white adjustment layer
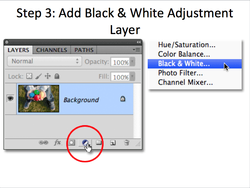
- Click on the "Add Adjustment Layer" icon at the bottom of your layers panel.
- Select "Black & White..."
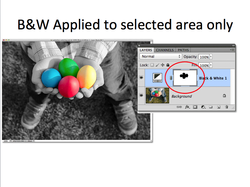
- This should turn the background black and white.
- You can see the area you have masked out in the small mask icon to the right of your adjustment layer.
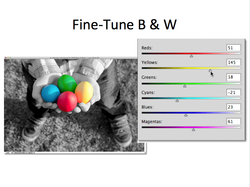
- Fine-tune the black and white values by using the color sliders.
- For example: sliding the "Red" slider to the right will lighten all of the areas that were red in the original picture, or had some red in them. Sliding to the left darkens that area.
- Play around with the sliders until you achieve a good range of light and dark values, with good contrast.
fixing mistakes
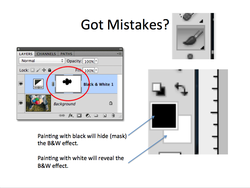
- If you made a mistake when "quick selecting" you can still fix it.
- Click on the mask icon to the right of your Black and White adjustment layer so it is selected.
- Use your paint brush tool.
- Paint with black to bring out color. (this is masking or hiding the B&W adjustment)
- Paint with white to turn it black and white. (this is revealing or unmasking the B&W adjustment)
other edits...
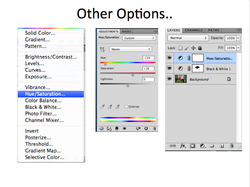
- If you like, add some other adjustment layers to change the hue, saturation etc.
